Struggling to pick the right end mill for your job? Choosing the wrong one can ruin your material, break your tool, and waste your time. This guide simplifies it.
For woodworking, use a 1 or 2-flute end mill for great chip clearance. For metals, use a 3 or 4+ flute tool for strength and a better finish. The material’s hardness, tool coating, and the shape you want to cut are also critical factors.
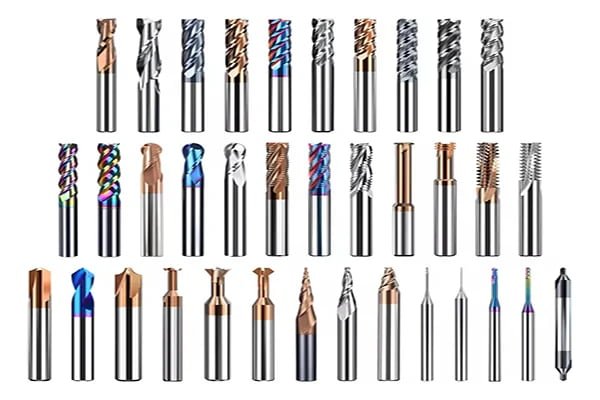
I've spent years in the cutting tool business, and I've seen it all. A simple mistake in tool selection can turn a profitable job into a costly failure. It's not as complicated as it seems, though. Once you understand a few basic principles, you’ll be able to walk up to your machine with confidence every single time. Let's break down how to make the right choice, starting with the most important question.
Why Does My Material Dictate My End Mill Choice? (The Core Principles)?
It’s tempting to use one end mill for everything. But this leads to poor cuts, rapid tool wear, and a lot of frustration. Understanding the core principles saves you trouble.
Your material dictates the end mill's geometry, like the number of flutes and helix angle. Soft materials need space for big chips (fewer flutes), while hard metals need more cutting edges (more flutes) and special coatings for heat and wear resistance.1
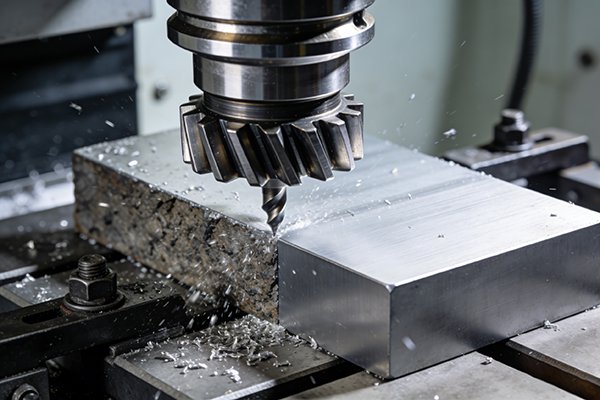
When I first started, I thought an end mill was just an end mill. I quickly learned that the material you're cutting is the real boss. It tells you everything you need to know about the tool. The entire design of an end mill—from its shape to its coating—is a direct response to the challenges a specific material presents.
It's All About Chip Evacuation and Heat
Think about the waste material, or "chips." Wood creates large, fibrous chips. If they can't get out of the way, they pack together, generate heat from friction, and can even cause a fire. That’s why woodworking end mills have very deep, wide flutes (the valleys between the cutting edges). On the other hand, steel creates small, hot, and sharp chips. The goal here isn't just evacuation but also tool strength. More flutes mean a thicker, stronger core for the end mill2, which is needed to handle the immense pressure of cutting hard metal. The coating on the tool acts like a shield, protecting the cutting edge from the intense heat generated when shearing through steel.3
| Feature | Wood Machining | Metal Machining |
|---|---|---|
| Chip Size | Large, fibrous | Small, sharp |
| Main Challenge | Chip evacuation, preventing friction/burning | Heat management, tool rigidity |
| Ideal Flute Count | Low (1-2) | High (3-4+) |
| Coating Need | Low (or none) | High (TiAlN, AlCrN) |
What Are My Go-To End Mills for Woodworking Projects?
Your latest wood project has ugly splintering and burn marks. This can ruin the look and feel of your hard work. Picking the right end mill is the secret to clean cuts.
For almost all woodworking, I use a 1 or 2-flute spiral end mill.4 They provide amazing chip clearance, which stops clogging and burning. An up-cut pulls chips out, while a down-cut pushes them down for a clean top surface.5
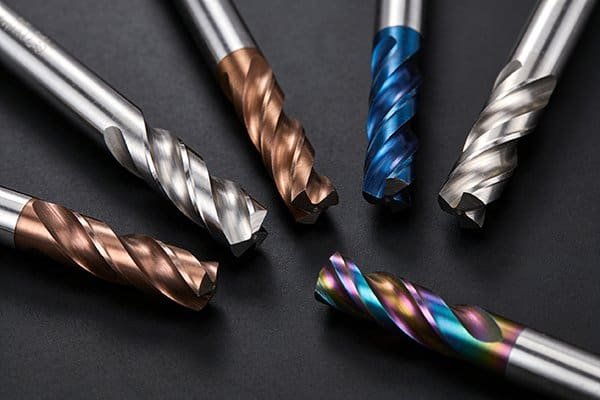
When working with wood, your main enemy is friction. Wood doesn't conduct heat well6, so if chips get packed into the cut, things get hot very fast. This leads to burning on the wood and resin buildup on your tool, which dulls it. The solution is to get those chips out as fast as possible. That's why low flute counts are king. With only one or two cutting edges, there is a massive amount of open space for chips to fly out. But it's not just about the number of flutes; the direction of the spiral matters just as much.
Up-Cut vs. Down-Cut vs. Compression
The "spiral" on an end mill works like a screw. It can either pull chips up or push them down.
-
Up-Cut Spirals: These are my general-purpose workhorses. The spiral pulls chips up and out of the cut. This is fantastic for clearing material quickly, especially in deep pockets or slots. The downside is that it can lift the top fibers of the wood, causing some fuzziness or tear-out on the top edge.
-
Down-Cut Spirals: These are my finishing tools. The spiral pushes chips down into the cut. This action shears the top fibers of the wood downward, leaving a perfectly clean, sharp top edge. It's ideal for cutting laminates or thin veneers without chipping them. The trade-off is that chips are packed into the slot, which can cause more heat.
-
Compression Spirals: This is a hybrid tool, the best of both worlds. It has an up-cut spiral on the bottom portion of the tool and a down-cut spiral on the top. As it cuts, it squeezes the material from both the top and bottom, giving you a clean edge on both sides. This is the absolute best choice for materials like plywood or laminated particleboard.7
| End Mill Type | Primary Use | Pro | Con |
|---|---|---|---|
| Up-Cut | General cutting, pocketing | Excellent chip evacuation | Can cause tear-out on top surface |
| Down-Cut | Finishing, laminates | Perfectly clean top surface | Poor chip evacuation, can cause heat |
| Compression | Plywood, composites | Clean top and bottom surfaces | More expensive, requires full depth cut |
Which End Mills Do I Need for Common Metals? (Aluminum vs. Steel)?
Cutting metal can feel intimidating. The wrong tool can snap instantly, damage your machine, or leave a terrible finish on an expensive part. Let's simplify the choices for aluminum and steel.
For aluminum, use a 2 or 3-flute end mill with a high helix angle and a polished, uncoated finish. For steel, use a 4+ flute end mill with a TiAlN or AlCrN coating for heat resistance and tool life.
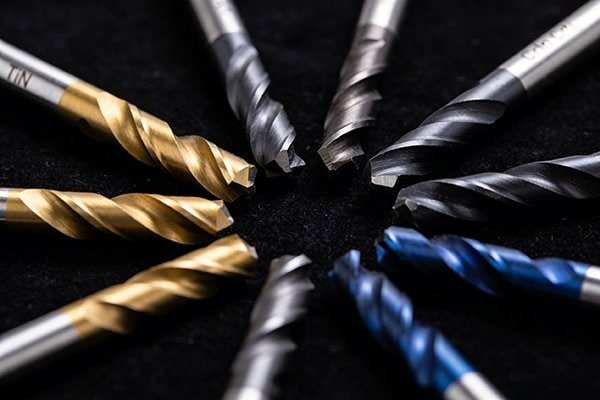
When you move from wood to metal, the rules of the game change completely. With metal, we're dealing with much higher forces, incredible heat, and materials that behave very differently. I often tell new clients to think of aluminum and steel as two separate worlds. What works for one will lead to disaster with the other. The key is to match the tool’s design to the metal’s specific properties.
Taming Aluminum: Gummy but Manageable
Aluminum is soft, but it's also very "gummy."8 This means it has a tendency to get sticky when it gets hot, and it can actually weld itself to the cutting edge of your tool. This is called "built-up edge," and it's a tool-killer.9 To fight this, you need two things: space and speed. A 2 or 3-flute end mill provides lots of space for the large, gummy aluminum chips to escape. The flutes are often highly polished and uncoated to make them as slippery as possible. A high helix angle (around 45°) acts like an auger, pulling those chips up and out very aggressively. You almost never want a standard TiAlN coating on a tool for aluminum, as the aluminum can chemically react with it.
Conquering Steel: Hardness and Heat are Your Enemies
Steel is the opposite of aluminum. It's hard, tough, and creates a ton of heat when you cut it. Here, tool strength and heat management are everything. This is where 4, 5, or even 6-flute end mills shine. More flutes mean more cutting edges are engaged with the material, which spreads out the cutting force and gives you a much smoother finish. It also means the core of the tool is thicker and more rigid, so it can withstand the high pressure of cutting steel without deflecting or breaking. The secret weapon here is the coating. A coating like TiAlN (Titanium Aluminum Nitride) creates a super-hard, thermally-resistant barrier that protects the carbide underneath from the extreme heat.10
| Feature | Aluminum | Steel |
|---|---|---|
| Flute Count | 2-3 Flutes | 4+ Flutes |
| Helix Angle | High (35-45°) | Standard (30°) or Variable |
| Coating | Uncoated (Polished) or ZrN/DLC | TiAlN or AlCrN |
| Main Challenge | Material welding to the tool | Extreme heat and cutting pressure |
Does My Desired Cut Shape Change My Tool Choice? (Flat vs. Ball vs. Bull Nose)?
You need to cut a specific profile, but you only have standard flat end mills. This limits your projects, preventing you from creating smooth curves or stronger internal corners. Let's match the tool's tip to your design.
Yes, absolutely. Use a flat end mill for 2D profiles and pockets. Use a ball nose end mill for 3D contouring and smooth surfaces. A bull nose is a hybrid, perfect for roughing and leaving a strong corner radius.
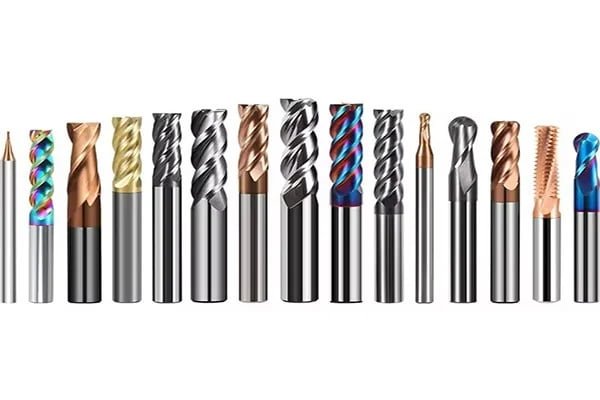
So far, we've focused on how the material dictates the main body of the end mill (flutes, coating). But the very tip of the tool is just as important. The shape of the tip determines the shape of the surface you leave behind. Choosing the right tip is the difference between a part that looks like it was made on a professional CNC and one that looks like a rough first attempt. I always tell my customers to think about the final geometry of their part and work backward to choose the right tool tip.
The Flat End Mill: Your 2D Specialist
This is the most common type of end mill. It has sharp corners that produce a 90-degree angle between the floor and the wall of a cut. It's the go-to tool for any 2D work: cutting out profiles, milling flat-bottomed pockets, facing off a block of material to make it flat, or milling a slot. While you can use it for some 3D work, it will leave a "stair-step" finish that requires a lot of sanding or a secondary finishing operation.
The Ball Nose End Mill: The 3D Artist
A ball nose end mill has a perfectly rounded tip, like the end of a ballpoint pen. This tool is the key to creating smooth, flowing 3D surfaces. It’s essential for machining molds, carving complex organic shapes, and creating fillets (rounded internal corners). When doing 3D finishing, the machine moves the ball nose in many tiny step-overs, and the rounded tip blends each pass into the next, creating a surface that is smooth to the touch right off the machine.
The Bull Nose End Mill: The Strong Hybrid
This tool is a mix between a flat and a ball nose. It has a flat bottom but with rounded corners, called a corner radius. This small radius has a huge impact. First, it makes the tool much stronger, as sharp corners are weak points. This allows you to run the machine faster and take heavier cuts, especially during roughing. Second, it leaves a small radius at the bottom of a wall, which removes a stress concentration point and makes the final part stronger. It's my favorite tool for roughing out a 3D part before coming back with a ball nose for the final finish.
| Tool Tip | Geometry | Primary Application |
|---|---|---|
| Flat | Square corners, flat bottom | 2D profiling, pocketing, facing |
| Ball Nose | Fully rounded tip | 3D contouring, surfacing, filleting |
| Bull Nose | Flat bottom, rounded corners | Heavy roughing, creating corner radii |
Can I See a Quick-Reference Chart? (The Ultimate End Mill Selection Cheat Sheet)?
You just need a quick answer without re-reading the whole article. It's frustrating to hunt for information when you're ready to start a job. Here is a simple chart to help.
This chart simplifies your choice. For softwoods, use a 1-2 flute up-cut. For aluminum, a 2-3 flute uncoated mill. For steel, a 4+ flute TiAlN-coated mill. Always match the tool tip (flat, ball, bull) to your desired geometry.
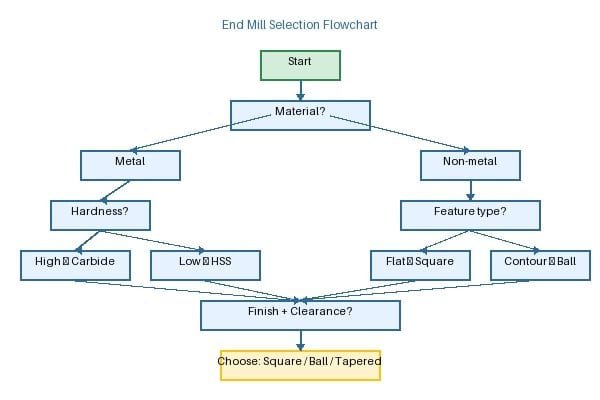
Over the years, I've answered thousands of questions about which end mill to use. While every job is unique, most fall into predictable categories. I put together this chart to serve as a starting point for the most common materials we see our customers machining every day. Think of this as your guide. Always consider your specific machine's power and rigidity, and remember that feeds and speeds are the other half of the equation. But getting the right tool in the spindle is the most important first step.
| Material | Flute Count | Coating | Tip Shape | Key Consideration |
|---|---|---|---|---|
| Softwood / Plywood | 1-2 Flute | Uncoated | Flat / Compression | Maximize chip evacuation to prevent burning. |
| Hardwood | 2-3 Flute | Uncoated | Flat / Ball Nose | More flutes can provide a better finish. |
| Plastics (Acrylic, Delrin) | 1-2 Flute (O-Flute) | Uncoated (Polished) | Flat | Prevent melting by clearing chips quickly. |
| Aluminum | 2-3 Flute | Uncoated / ZrN | Flat / Bull Nose | Prevent material welding to the tool. |
| Mild Steel | 4 Flute | TiAlN | Flat / Bull Nose | Manage heat and use a rigid tool. |
| Stainless / Hard Steel | 4-6 Flute | AlCrN / TiSiN | Bull Nose / Ball | High heat resistance and tool strength are critical. |
Remember, this is a general guide. At NineVibes Tools, we often create custom solutions because a customer's specific alloy or machine setup might benefit from a unique geometry or coating. A tool that is perfectly dialed in for your job can save you a huge amount of time and money in the long run. Don't ever hesitate to ask for advice; helping you find that perfect tool is what we are here for.
Conclusion
Material dictates your flutes and coating. The final shape dictates the tool tip. Master these basics, and you will dramatically improve your machining results, reduce scrap, and extend tool life.
"[PDF] CNC ROUTER BITS GUIDE - Beta Centralseminary Edu", https://beta.centralseminary.edu/uploaded-files/ynzlS6/6FE112/cnc-router_bits_guide.pdf. A machining reference or manufacturing text explains that flute count affects chip space and tool-core strength, and that coatings are commonly used to improve wear and thermal resistance in metal cutting. Evidence role: mechanism; source type: education. Supports: Soft materials generally require fewer flutes for chip clearance, while hard metals often benefit from more flutes and heat- or wear-resistant coatings.. Scope note: This supports the general principle; optimal flute count and coating still depend on machine rigidity, tool diameter, feed rate, coolant, and the specific work material. ↩
"5pcs HRC55 tip Diameter 6mm 2 Flute End Mill CNC Milling Cutter ...", https://reframedarchives.sandbox.library.columbia.edu/listing/5pcs-hrc55-tip-diameter-6mm-2-flute-end-mill-cnc-milling-cut?srsltid=218139088. A machining handbook or technical manufacturing source explains that increasing flute count can increase the tool core/web diameter and stiffness, although it reduces chip-gullet volume. Evidence role: mechanism; source type: education. Supports: Higher flute-count end mills often have a thicker, more rigid core.. Scope note: The relationship depends on the cutter design; some high-flute tools may use specialized geometries that alter chip-space and core-size tradeoffs. ↩
"PERFORMANCE OF COATED CUTTING TOOLS IN ...", http://conferences.sta.uwi.edu/iconetech2020/documents/RSRevuru-PERFORMANCEOFCOATEDCUTTINGTOOLSINMACHINING.pdf. A cutting-tool coating study or review reports that hard ceramic coatings such as TiAlN and AlCrN improve oxidation, wear, and thermal resistance of carbide tools in high-temperature metal cutting. Evidence role: mechanism; source type: paper. Supports: Tool coatings help protect cutting edges from heat and wear during steel machining.. Scope note: Coating performance varies with cutting speed, coolant strategy, substrate, and workpiece alloy, so the evidence supports the general function rather than a universal outcome. ↩
"[PDF] CNC ROUTER BITS GUIDE", https://beta.centralseminary.edu/virtual-library/ynzlS6/6FE112/cnc__router-bits-guide.pdf. A CNC woodworking or wood-machining educational source notes that one- and two-flute spiral cutters are commonly used in routing wood because larger flute gullets help evacuate chips from the cut. Evidence role: expert_consensus; source type: education. Supports: One- and two-flute spiral cutters are common choices for many woodworking CNC operations because they improve chip evacuation.. Scope note: The phrase “almost all” is experiential; the citation can support common use and rationale, not the author’s personal practice or every woodworking application. ↩
"[PDF] CNC ROUTER BITS GUIDE - old.lytlesrebc.edu", https://old.lytlesrebc.edu/manuscript/9aZ37S6AD210/Cnc_Router_Bits_Guide. A CNC routing reference explains that up-cut spirals lift chips upward out of the cut, while down-cut spirals push chips downward and can reduce tear-out on the top face. Evidence role: definition; source type: education. Supports: Up-cut and down-cut spiral tools move chips in opposite directions and affect top-edge quality differently.. Scope note: Surface quality also depends on feed rate, cutter sharpness, material structure, hold-down, and depth of cut. ↩
"List of thermal conductivities", https://en.wikipedia.org/wiki/List_of_thermal_conductivities. An engineering materials source lists wood as having low thermal conductivity relative to metals, supporting the statement that heat generated during cutting is less readily conducted away through the workpiece. Evidence role: mechanism; source type: education. Supports: Wood is a poor heat conductor compared with metals.. Scope note: Thermal conductivity varies by wood species, moisture content, and grain direction, so the source provides contextual rather than species-specific support. ↩
"CNC Bits for Cutting HPL Laminate", https://woodweb.com/knowledge_base/CNC_Bits_for_Cutting_HPL_Laminate.html. A woodworking or composite-panel machining source explains that compression spiral cutters combine up-cut and down-cut geometry to reduce chipping on both faces of sheet goods such as plywood and laminated panels. Evidence role: mechanism; source type: education. Supports: Compression spiral tools are often preferred for plywood and laminated particleboard when clean top and bottom edges are required.. Scope note: The wording “absolute best” is stronger than most sources will establish; evidence can support compression tools as commonly preferred for double-sided edge quality, not universally best in all machines or cuts. ↩
"[PDF] Effect of Machining Feed on Surface Roughness in Cutting 6061 ...", https://open.clemson.edu/cgi/viewcontent.cgi?article=1060&context=auto_eng_pub. A metal-cutting or materials source describes aluminum alloys as relatively ductile and prone to adhesion during machining, providing context for the informal characterization of aluminum as “gummy.” Evidence role: mechanism; source type: education. Supports: Aluminum can behave as a ductile, adhesive material during machining.. Scope note: Machinability differs substantially among aluminum alloys; free-machining alloys behave differently from very ductile or heat-treated grades. ↩
"Built-up-edge Formation and its Effect on Surface Topography and ...", https://ui.adsabs.harvard.edu/abs/2025JMEP..tmp.1701K/abstract. A machining source defines built-up edge as workpiece material adhering to the cutting edge and explains that it can degrade surface finish, alter cutting geometry, and accelerate tool wear. Evidence role: definition; source type: education. Supports: Built-up edge is adhered work material on a cutting tool that can damage cutting performance and tool life.. Scope note: The phrase “tool-killer” is colloquial; evidence can support increased wear and degraded performance rather than inevitable tool failure. ↩
"Cutting Performance of Different Coated Micro End Mills in ...", https://pmc.ncbi.nlm.nih.gov/articles/PMC6267563/. A peer-reviewed coating study or materials reference reports that TiAlN coatings are hard, oxidation-resistant, and thermally stable at elevated temperatures, which supports their use as protective coatings on carbide cutting tools. Evidence role: mechanism; source type: paper. Supports: TiAlN coatings provide hard, thermally resistant protection for carbide tools in high-heat machining.. Scope note: The citation would support material properties and typical use; actual tool-life improvement depends on cutting conditions, tool substrate, coating architecture, and workpiece steel. ↩