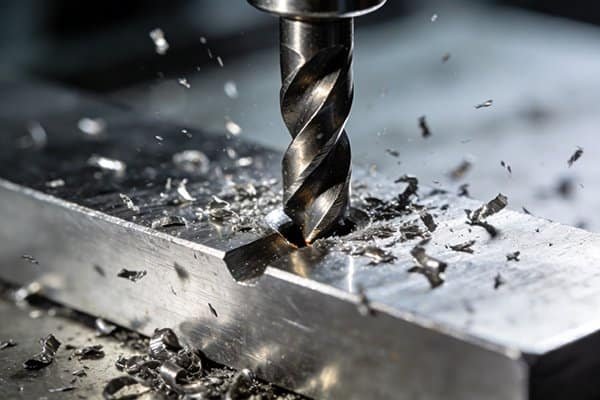
Confused by the endless types of end mills? Choosing the wrong one can ruin your workpiece and cost you money. This guide makes selecting the right tool simple and clear.
Start with a roughing end mill (fewer flutes, like 2 or 3) to remove a lot of material quickly. Then, switch to a finishing end mill (more flutes, like 4 or more) with the right profile—flat, ball, or radius—to create the final shape and a smooth surface.
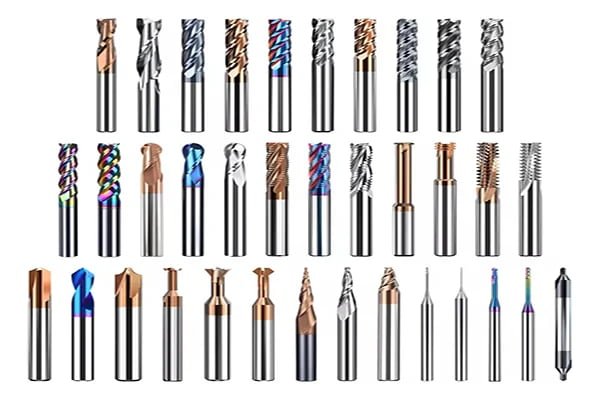
Getting the right tool for the job is a real game-changer. It's the difference between a frustrating, slow process and an efficient, profitable one. We've helped thousands of customers make this choice, and it always comes down to a few basic questions. Let's break down the first and most important decision you need to make.
First, What Is My Primary Goal? (Fast Material Removal vs. Creating the Final Shape)?
Are you unsure whether to prioritize speed or precision first? Using a finishing tool for roughing is incredibly slow and will wear it out fast. Let's match your tool to the job.
For fast material removal, or roughing, use end mills with fewer flutes (2-3) for better chip evacuation. For creating the final shape, or finishing, use end mills with more flutes (4 or more) to get a smoother surface finish and higher accuracy.
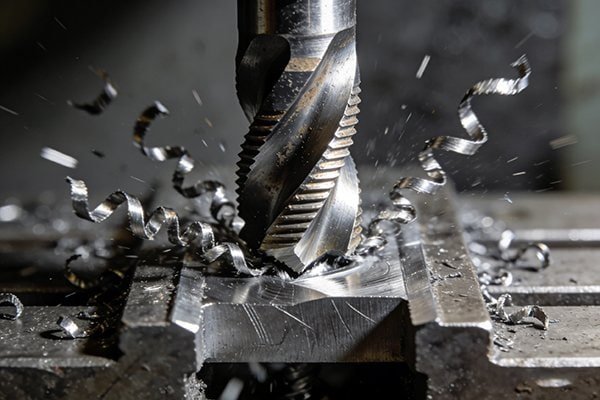
In every machining project, we break the work into two main stages: roughing and finishing. Your goal for each stage is completely different, so you need a different type of tool.
Roughing: The Need for Speed
The only goal of roughing is to remove as much material as possible, as quickly as possible. You're not worried about the surface finish at this point. The key here is chip evacuation. Large chips need a lot of space to escape, which is why we use end mills with fewer flutes, typically two or three1. The large gaps between the cutting edges give those big chips a clear path out, preventing the tool from getting clogged and breaking. For this stage, you want to push the tool hard and fast.
Finishing: The Art of Precision
Once the bulk material is gone, you switch to finishing. Here, your goals are dimensional accuracy and a beautiful surface finish. For this, we use end mills with more flutes—four, six, or even more2. With more cutting edges engaged with the material, each flute takes a much smaller bite. This reduces tool pressure, minimizes deflection3, and leaves a much smoother wall. The chips are tiny, so you don't need as much space for evacuation.
| Feature | Roughing End Mill | Finishing End Mill |
|---|---|---|
| Primary Goal | Fast Material Removal | High Surface Quality |
| Flute Count | Low (2-3 Flutes) | High (4+ Flutes) |
| Chip Size | Large | Small |
| Machining Focus | High Feed Rates | Precise Dimensions |
What Shape Does the Bottom of My Feature Need to Be? (The Critical Flat vs. Ball vs. Radius Choice)?
Do you need a specific shape on the floor of a pocket but don't know the tool? A flat end mill can't create a rounded bottom, and a ball nose can't make a sharp corner.
Use a flat bottom (square) end mill for 90-degree corners and flat surfaces. Use a ball end mill for 3D contouring and fully rounded bottoms. Use a radius (bull nose) end mill for strong, filleted corners between the floor and walls.
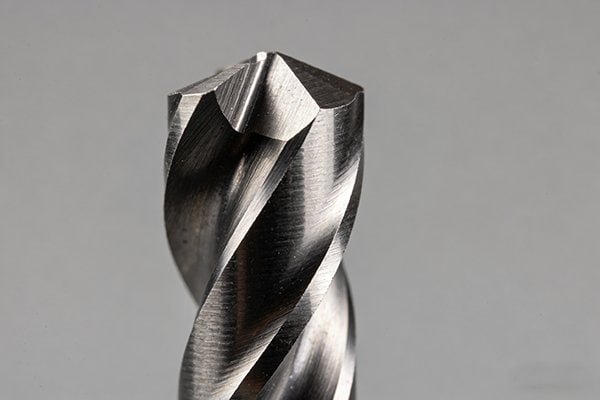
After deciding between roughing and finishing, the next question is about geometry. The shape of the end mill's tip directly creates the shape on your part.4 In my experience, 99% of jobs can be done with one of these three profiles.
Flat Bottom (Square) End Mills
This is the workhorse of any machine shop. It has sharp corners that create a true 90-degree angle between a wall and the floor5. We use these for facing off material, milling square slots, creating pockets with flat bottoms, and general profiling. If your design has a sharp internal corner, this is the tool you need.
Ball End Mills
A ball end mill has a fully rounded tip, like the end of a ballpoint pen. This tool is essential for 3D machining6. Think of complex, organic shapes, molds, or any surface that isn't flat. It excels at surfacing and contouring, creating smooth, flowing features. It's also the only tool that can mill a perfectly round-bottomed slot or channel.
Radius (Bull Nose) End Mills
This tool is a hybrid. It's a flat bottom end mill, but the sharp corners have been rounded to a specific radius. This is my personal favorite for many applications because it creates a fillet—a small, curved transition—between the floor and the wall. This fillet makes the part significantly stronger by reducing stress concentration7. It also makes the tool itself more durable, as sharp corners are the weakest point on a flat end mill8.
How Do I Create the Side Features Like Walls, Slots, and Edges?
Are you struggling to get clean walls and perfect slots? Using the wrong tool can cause chatter, a poor finish, and inaccurate parts. The secret is in the tool's design.
For side milling, the helix angle is very important. A higher helix angle (like 45°) gives a smoother shearing action for a better wall finish.9 More flutes also help by providing more support, but you need to balance this with chip clearance for slots.
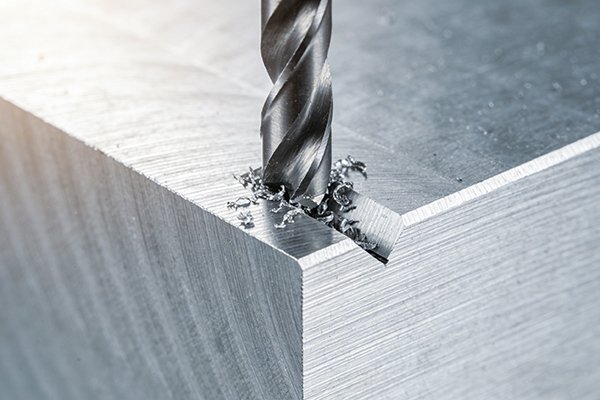
When you're cutting a profile, a slot, or the walls of a pocket, you're relying on the side cutting edges of the end mill. Two features are very important here: the number of flutes and the helix angle.
Flutes and Helix Angle Working Together
The helix angle is the angle of the cutting edges as they spiral up the tool. This angle determines how the tool engages with the material.
- High Helix (35°-60°): This is my go-to for finishing walls. The aggressive angle creates a smooth, shearing cut that peels the material away quietly. It also does a great job of pulling chips up and out of the cut10. This results in an excellent surface finish.
- Standard Helix (30°-35°): This is a good all-around choice that balances strength and cutting performance. It works well for both slotting and profiling in a wide range of materials.
- Low Helix (below 30°): These tools have a stronger cutting edge but a rougher cutting action. They are typically used for tough, hard-to-machine materials where edge strength is the top priority.
For the number of flutes, more flutes are better for a fine finish on a wall, while fewer flutes are necessary for deep slotting to get chips out.
Special Tools for Edges
Finally, don't forget about the edges of your part. A Chamfer End Mill is designed specifically to cut a clean, angled bevel on an edge. This simple step removes sharp burrs, makes parts safer to handle, and helps them assemble correctly.
Is There a 'Secret Weapon' for Removing Material Even Faster?
Is your standard roughing process too slow for your production goals? Wasting time on long cycle times costs you money and can even lose you jobs. There is a better way.
Yes, the "secret weapon" is a roughing end mill, also known as a corn cob or hog mill. Its special serrated cutting edges break chips into small pieces, allowing for much deeper cuts and faster removal rates with less vibration.
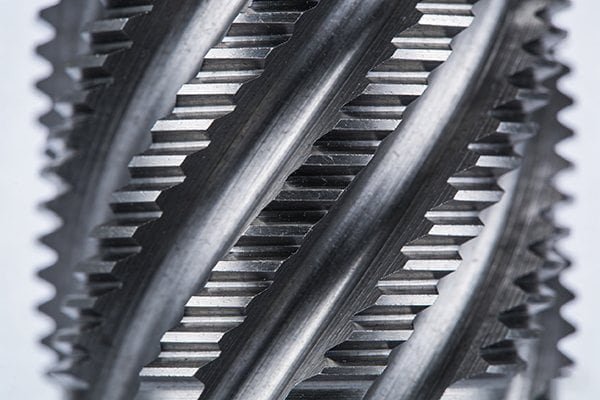
When you absolutely must remove a massive amount of material in the shortest possible time, you need a specialized tool. That tool is the roughing end mill. We call it a "hog mill" for a reason—it just eats material.
How Does It Work?
Unlike a standard end mill with smooth cutting edges, a rougher has serrations or waves along its flutes. These look like the kernels on a corn cob, which is where it gets its nickname. These serrations act like chipbreakers. Instead of creating long, stringy chips, they break the material into many small, manageable segments11. This simple change has a huge impact. It drastically reduces cutting forces, heat, and vibration.
The Advantage of Small Chips
Because the cutting pressure is so much lower, you can take much deeper axial cuts (depth of cut) and wider radial cuts (width of cut). We're talking about taking cuts that would instantly snap a standard end mill. This allows you to increase your Material Removal Rate (MRR) by a huge amount, sometimes cutting cycle times by more than half. The surface finish it leaves is very rough, but that doesn't matter. You will always follow a roughing pass with a finishing pass using a standard end mill to clean it up and bring the part to its final dimension.
Can You Give Me a Visual Flowchart to Guide My End Mill Selection?
Are you feeling a little overwhelmed by all these options? Making the wrong choice on the shop floor can be a costly mistake. Let's simplify it with a clear decision path.
Yes. First, ask: "Roughing or Finishing?" For roughing, choose a 2-3 flute or a corn cob rougher. For finishing, ask: "What shape do I need?" Then choose a flat, ball, or radius end mill. Finally, consider the material to select the coating.
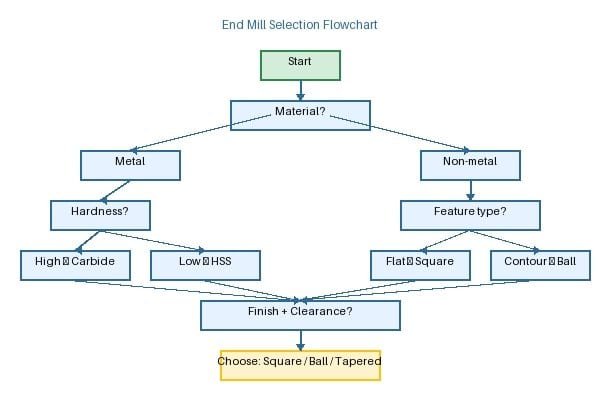
I've walked hundreds of machinists through this process. It always helps to think of it as a simple decision tree. Just answer these questions in order, and you'll arrive at the right tool every time.
Step 1: What is my Operation?
- Is it Roughing? (My goal is speed and bulk material removal).
- For MAXIMUM speed, use a Corn Cob Roughing End Mill.
- For general-purpose roughing or deep slotting, use a 2 or 3-Flute Flat End Mill. The low flute count is critical for getting big chips out of the way.
- Is it Finishing? (My goal is accuracy and surface quality).
- Proceed to Step 2.
Step 2: What is the Final Shape I Need?
- Do you need a flat floor and sharp 90° inside corners?
- Use a 4+ Flute Flat End Mill. The higher flute count will give you a beautiful surface finish.
- Do you need a curved surface, 3D contour, or a round-bottomed slot?
- Use a Ball End Mill.
- Do you need a flat floor with a rounded transition (fillet) to the wall?
- Use a Radius (Bull Nose) End Mill. This gives you part strength and better tool life.
Step 3: What Material Am I Cutting?
- This final step helps you choose the right tool material (we recommend solid carbide for most applications) and the best coating. For example:
- Steel/Stainless Steel: TiAlN coating is a fantastic all-around performer12.
- Aluminum: Use an uncoated, polished tool to prevent material from sticking.
- Hardened Steels: Use a tool with a specialized high-heat coating like AlCrN.
Conclusion
Choosing the right end mill is simple. Match the tool to the task: roughing first for speed, then finishing with the correct shape for your final design.
"[PDF] Helical - MACHINING GUIDEBOOK", https://web.mae.ufl.edu/designlab/Advanced%20Manufacturing/Helical_Machining_Guidebook.pdf. A machining textbook or university manufacturing-process reference can support that lower flute counts provide larger chip gullets, which improves chip evacuation during roughing cuts. Evidence role: mechanism; source type: education. Supports: Roughing end mills commonly use fewer flutes, such as two or three, because larger flute spaces help evacuate large chips.. Scope note: The optimal flute count also depends on workpiece material, cutter diameter, coolant delivery, and cutting parameters. ↩
"6+ Easy How to Calculate Chip Load (+Chart) - mabts.edu |", https://dev.mabts.edu/how-to-calculate-chip-load/. A manufacturing engineering source can support that increasing the number of cutting edges generally reduces chip load per tooth at a given feed rate and can improve surface finish in finishing operations. Evidence role: mechanism; source type: education. Supports: Finishing end mills often use four or more flutes to reduce chip load per tooth and improve surface finish.. Scope note: This is a general relationship; excessive flute count can impair chip evacuation in some materials or deep cuts. ↩
"[PDF] Helical - MACHINING GUIDEBOOK", https://web.mae.ufl.edu/designlab/Advanced%20Manufacturing/Helical_Machining_Guidebook.pdf. A mechanical or manufacturing engineering reference can support that lower cutting forces and smaller chip loads are associated with reduced tool deflection in milling. Evidence role: mechanism; source type: education. Supports: Smaller finishing cuts can reduce tool pressure and tool deflection.. Scope note: Actual deflection depends on tool stick-out, cutter diameter, material stiffness, engagement, and machine rigidity. ↩
"Comparison of Milling Strategies in the Production of Shaped Surfaces", https://www.academia.edu/100246873/Comparison_of_Milling_Strategies_in_the_Production_of_Shaped_Surfaces. A manufacturing-process reference can support that the geometry of a milling cutter determines the machined surface geometry produced by its cutting edges. Evidence role: mechanism; source type: education. Supports: The tip profile of an end mill influences the bottom or contoured shape machined into the workpiece.. Scope note: The statement is simplified because toolpath strategy, machine kinematics, runout, and tool wear also affect the final geometry. ↩
"Mill Tooling Guide - Purdue University", https://www.purdue.edu/bidc/resources/metal-working/mill-tooling-guide/. A technical reference on end mill geometry can support that square-end mills are designed to cut flat bottoms and square shoulders in milling operations. Evidence role: definition; source type: education. Supports: Square or flat end mills are used to machine flat surfaces and nominal 90-degree shoulders.. Scope note: In practice, a perfectly sharp internal corner may be affected by tool corner radius, wear, runout, and machine accuracy. ↩
"Accurate Machining of Freeform Surfaces by Restraining Cutter ...", https://www.academia.edu/69787313/Accurate_Machining_of_Freeform_Surfaces_by_Restraining_Cutter_Contouring_Errors. A manufacturing or CAD/CAM machining reference can support that ball-end mills are commonly used for freeform surface machining and three-dimensional contouring because their rounded tips maintain contact over curved toolpaths. Evidence role: definition; source type: education. Supports: Ball end mills are commonly used for 3D contouring and freeform surface machining.. Scope note: Other tool types may also be used for some 3D operations depending on surface geometry and strategy. ↩
"[PDF] 6. stress concentration and stress raisers", https://courses.washington.edu/me354a/chap6.pdf. A mechanical-design or materials reference can support that fillets reduce stress concentration at internal corners compared with sharp corners. Evidence role: mechanism; source type: education. Supports: Rounded fillets at floor-wall transitions can improve part strength by reducing stress concentration.. Scope note: The amount of strength improvement depends on load case, material, radius size, and part geometry. ↩
"[PDF] Helical - MACHINING GUIDEBOOK", https://web.mae.ufl.edu/designlab/Advanced%20Manufacturing/Helical_Machining_Guidebook.pdf. A cutting-tool engineering source can support that cutter corners experience high stress and wear in milling, and that corner radii can improve edge strength and tool life. Evidence role: mechanism; source type: research. Supports: Rounded tool corners can improve tool durability compared with sharp-corner square end mills.. Scope note: Tool failure location depends on engagement conditions, material, coating, and tool geometry. ↩
"Influence of End Mill Geometry on Milling Force and Surface Integrity ...", https://ui.adsabs.harvard.edu/abs/2021JIEIC.102.1503J/abstract. A machining research paper or manufacturing reference can support that helix angle affects cutting-force direction, chip flow, and surface finish in end milling. Evidence role: mechanism; source type: paper. Supports: Higher helix-angle end mills can produce a smoother shearing action and improved wall finish in suitable applications.. Scope note: A 45-degree helix is an example rather than a universal optimum; material, cutter design, and cutting parameters influence results. ↩
"[PDF] Helical - MACHINING GUIDEBOOK", https://web.mae.ufl.edu/designlab/Advanced%20Manufacturing/Helical_Machining_Guidebook.pdf. A manufacturing-process source can support that helical flute geometry influences chip evacuation direction, with higher-helix tools often promoting upward chip flow in end milling. Evidence role: mechanism; source type: education. Supports: High-helix end mills can aid chip evacuation by directing chips upward out of the cut.. Scope note: Chip evacuation also depends on flute volume, coolant or air blast, toolpath, and material chip form. ↩
"[PDF] design and optimization of end mills with special geometries for high ...", https://research.sabanciuniv.edu/42529/1/10420484.pdf. A cutting-tool or manufacturing reference can support that roughing end mills use serrated cutting edges as chip breakers to divide chips into shorter segments and lower cutting loads. Evidence role: mechanism; source type: education. Supports: Serrated roughing end mills break chips into smaller segments, improving chip control during heavy material removal.. Scope note: The magnitude of force reduction varies with workpiece material, engagement, feed, speed, and tool geometry. ↩
"[PDF] PERFORMANCE OF COATED CUTTING TOOLS IN MACHINING", http://conferences.sta.uwi.edu/iconetech2020/documents/RSRevuru-PERFORMANCEOFCOATEDCUTTINGTOOLSINMACHINING.pdf. A materials or surface-engineering source can support that TiAlN coatings are widely used on cutting tools because of their oxidation resistance, hot hardness, and wear resistance in high-temperature machining. Evidence role: general_support; source type: paper. Supports: TiAlN is a commonly used cutting-tool coating for steel and stainless-steel machining applications.. Scope note: The source would support TiAlN as a common high-temperature cutting-tool coating, not prove it is optimal for every steel or stainless-steel application. ↩