Choosing the wrong drill bit can ruin your workpiece and waste money. Use this pro checklist to pick the perfect solid carbide jobber drill1 every single time.
To select the right solid carbide jobber drill1, you must consider the material you are cutting, the required hole tolerance2, and your machine's capabilities. Matching the drill's geometry3 and coating4 to these factors is critical for performance5 and tool life.
I've been in the cutting tool business for over a decade. I’ve seen countless machinists6 struggle with this exact problem. It’s not just about picking a drill from a catalog; it's about picking the right drill for the job. A small mistake here can lead to big headaches, from scrapped parts to broken tools.
But it doesn't have to be complicated. I'm going to break down how to do it, step-by-step, so you can avoid the common mistakes. This guide will help you get it right, boost your efficiency, and ultimately, improve your bottom line.
Why Choose Solid Carbide for a Jobber-Length Bit?
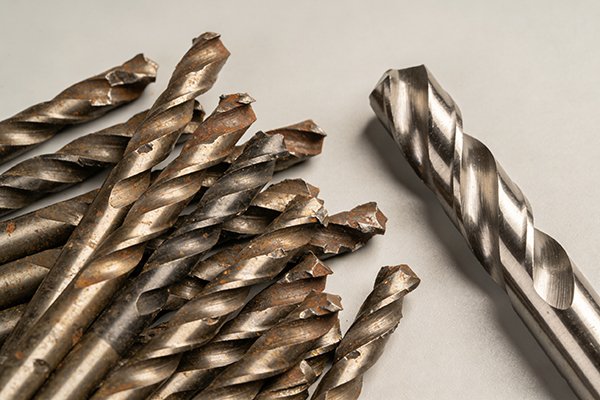
Your HSS drills7 wear out too fast on tough materials, right? This slows down your production and drives up your tooling costs. Solid carbide offers superior hardness for longer life.
Choose solid carbide for a jobber-length bit because of its incredible hardness and wear resistance. It drills much faster and lasts significantly longer than High-Speed Steel (HSS), especially in abrasive or hardened materials. This means higher efficiency and fewer tool changes for your shop.
I remember a customer who was machining hundreds of holes in stainless steel brackets. They were burning through HSS drills7 every hour. It was a nightmare for their production schedule8. When we switched them to a solid carbide drill, one tool lasted the entire shift. The difference was night and day. This is the power of carbide.
What Makes Carbide So Tough?
Carbide, which we often call tungsten steel, isn't a simple metal. It's a composite material. We make it by taking super-fine tungsten carbide9 powder and mixing it with a binder, usually cobalt. Then we press it and heat it in a special furnace. This process, called sintering10, creates an incredibly hard and dense material. It has a hardness of HRA90 or more, which is way harder than HSS. It also keeps its hardness even when it gets very hot, up to 1000°C. This is why it can cut so much faster.
Carbide vs. HSS: A Head-to-Head Comparison
The main difference is the material itself. An HSS drill is made entirely of steel. It's tough but loses its hardness when it gets hot. A solid carbide drill is hard all the way through. This gives it a huge advantage in performance5 and stability.
| Feature | High-Speed Steel (HSS) | Solid Carbide |
|---|---|---|
| Hardness | Good | Excellent (HRA90+) |
| Heat Resistance | Fair (up to 600°C) | Excellent (up to 1000°C) |
| Cutting Speed | Standard | 3-5x Faster |
| Tool Life | Short | Very Long (10x+ HSS) |
| Best For | General purpose, soft metals | Hard materials, high production |
This is why carbide is the top choice for machining difficult materials like stainless steel, hardened steel11, and titanium alloys. It just performs better and lasts longer.
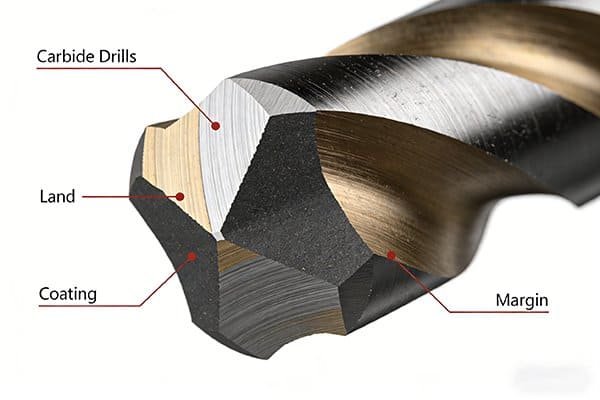
What's More Important: The Coating or The Point Geometry?
Your new carbide drill isn't performing like you expected. You start to wonder if you chose the wrong coating4 or the wrong point geometry12. Both are crucial for success.
Both coating4 and point geometry12 are critical, but they do different jobs. The point geometry12 dictates how the drill cuts and centers. The coating4 protects the cutting edge from heat and wear. For the best results, you need the right combination for your specific material.
Think of it like this: the point geometry12 is the engine of a car, and the coating4 is the high-performance5 oil. The engine does the work, but the oil keeps it from breaking down under pressure. You need both to win the race. I once helped a client who was getting poor hole quality in aluminum13. They were using a standard 135-degree drill. We switched them to a drill with a polished flute and a sharper point designed for aluminum13. The problem vanished immediately. The geometry was the key.
Understanding Point Geometry
The tip of the drill does all the initial work. The wrong geometry can cause the drill to "walk" or wander, leading to inaccurate holes. It can also create too much cutting force, which can break the tool.
- 118° Standard Point: This is a general-purpose angle. It works well for mild steel, cast iron, and other soft materials. It’s a good starting point for many jobs.
- 135° Split Point14: This is the most common geometry for solid carbide drills. The "split point" helps the drill center itself without needing a pilot hole. It's excellent for harder materials like stainless steel and alloy steels because it requires less pushing force.
- Specialty Geometries: For materials like aluminum13 or composites, you might need a special point with a different angle or a specific flute design to clear chips effectively.
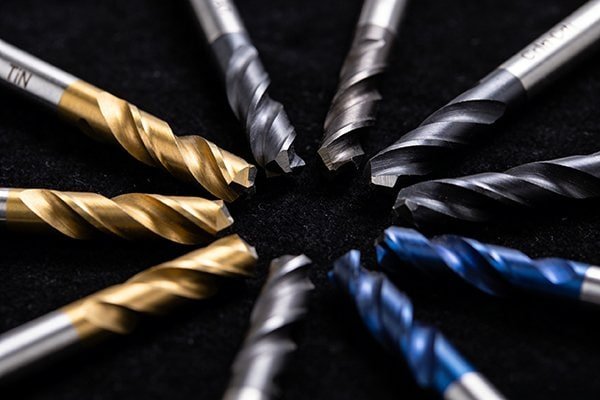
The Role of a Good Coating
A coating4 is a micro-thin layer of very hard material applied to the drill's surface. Its main job is to act as a barrier between the tool and the workpiece. This reduces friction, prevents material from sticking to the drill, and protects the carbide from the intense heat generated during cutting.
| Coating | Primary Use | Color |
|---|---|---|
| TiN (Titanium Nitride) | General purpose, ferrous materials | Gold |
| TiCN (Titanium Carbonitride) | Abrasive materials, cast iron | Violet/Gray |
| TiAlN (Titanium Aluminum Nitride) | High-temp alloys, stainless steel, hardened steel11 | Violet/Black |
| AlCrN (Aluminum Chromium Nitride) | High-speed dry machining, tough alloys | Gray |
Choosing the right coating4 can easily double or triple the life of your drill bit, especially when you're pushing it hard.
Which Brands are a Machinist's First Choice?
The market is full of drill bit brands. It's hard to know which ones are reliable and which ones are just cheap. Experienced machinists6 often trust a few key names.
Machinists often choose trusted premium brands like Kennametal, Sandvik Coromant, and Walter for their consistent quality. However, high-value brands15 like our own NINEVIBES offer professional performance5 at a much better price, making them a smart choice for many shops.

Over the years, I've worked with tools from dozens of manufacturers. The big European and American brands make fantastic products, there's no doubt about it. They have huge research budgets and a long history. But I've also seen that many shops are paying for the brand name, not just the performance5. That's why we started NINEVIBES. We use the same high-quality tungsten steel and advanced coating4 technologies, but because we are the factory, we can provide that same level of performance5 without the massive price tag.
Premium Brands vs. High-Value Brands
When you're buying tools, you're making an investment. It's important to understand what you're paying for. The big brands have built a reputation over decades, and their quality is usually very consistent. They are a safe bet, but they come at a premium cost. High-value brands focus on delivering the best possible performance5 for the price.
| Factor | Premium Brands (e.g., Walter, Sandvik) | High-Value Brands (e.g., NINEVIBES) |
|---|---|---|
| Price | High | Competitive |
| Performance | Excellent | Excellent |
| Innovation | Often leads with new technology | Adopts proven technology quickly |
| Support | Strong global network | Direct-from-factory support |
| Best For | Shops where budget is no object | Shops focused on cost-per-hole and ROI16 |
The choice really depends on your business priorities. If you need the absolute latest, cutting-edge technology and have the budget for it, a premium brand might be for you. But if you want a reliable, high-performance5 tool that gives you the best return on your investment, a brand like NINEVIBES is often the smarter choice. We stand behind our quality with a 100% satisfaction guarantee.
What's the Smartest Way to Make Your Final Selection?
You have all this information, but you might still feel a little unsure. Making the wrong choice can be an expensive mistake. The solution is to follow a simple checklist.
The smartest way to choose is to use a step-by-step process. Start with your workpiece material. Then, match the drill's diameter, geometry, and coating4 to your job requirements and machine capabilities. Finally, consider the total cost of ownership17, not just the purchase price.

I always tell my customers to think like an engineer. Don't guess. Use a logical process to find the best tool. It only takes a minute, and it can save you hours of frustration and thousands of dollars in the long run. Let's walk through the exact checklist I use.
Your 5-Step Selection Checklist
Follow these steps every time you need to select a new drill, and you will get consistent, reliable results.
-
Identify Your Workpiece Material. This is the most important step. Are you drilling 304 Stainless Steel, 6061 Aluminum, or P20 Mold Steel? The material's hardness and properties will determine everything else.
-
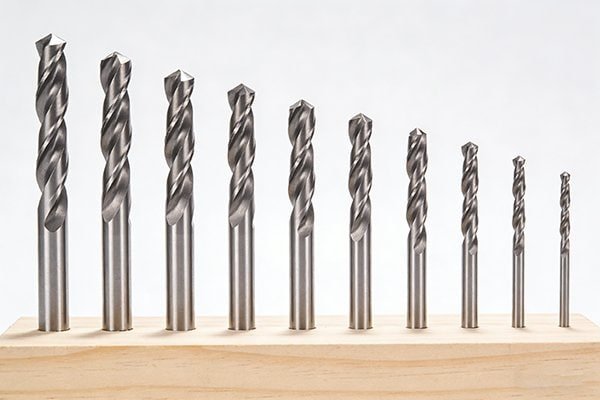
Define Your Hole Specifications. What is the final hole diameter you need? What is the tolerance? How deep is the hole? This will determine the size and length of the drill you need. A jobber-length drill is a great all-around choice for holes up to about 5 times the drill's diameter.
-
Check Your Machine's Capabilities. Can your machine provide enough RPM and feed rate for a carbide drill? Does it have through-spindle coolant? A powerful, rigid machine will get the most out of a high-performance5 carbide drill. If your machine is older, you may need to adjust your parameters.
-
Select Geometry and Coating. Now, use the information from steps 1-3 to make your choice. For stainless steel, you'll want a 135° split point with a TiAlN coating4. For aluminum13, a sharper point with polished flutes is better.
-
Calculate the Total Cost of Ownership. Don't just look at the price of the drill. A cheaper drill that only lasts for 100 holes is more expensive than a drill that costs more but lasts for 1,000 holes.
| Cost Factor | Drill A (Low Price) | Drill B (High-Value) |
|---|---|---|
| Price per Drill | $10 | $20 |
| Holes per Drill | 100 | 500 |
| Cost per Hole | $0.10 | $0.04 |
As you can see, the "more expensive" Drill B is actually more than twice as cheap to run. This is the smart way to buy tooling.
Conclusion
Choosing the right drill comes down to matching the tool to your job. Focus on the material, geometry, and coating4. Follow this guide, and you'll improve your shop's efficiency.
Explore the advantages of solid carbide jobber drills for enhanced performance and longevity in machining. ↩
Understanding hole tolerance is crucial for precision machining; find resources to master this aspect. ↩
Learn how drill geometry affects cutting performance and tool life for better machining outcomes. ↩
Discover how various drill coatings can enhance tool performance and durability in different materials. ↩
Explore the various factors that impact drill bit performance for better machining outcomes. ↩
Find out the key factors machinists consider when selecting drill bits for their work. ↩
Find out why HSS drills may not be suitable for tough materials and explore better alternatives. ↩
Learn how the right drill selection can significantly affect production efficiency and timelines. ↩
Gain insights into tungsten carbide's properties and its advantages in cutting tools. ↩
Learn about the sintering process that creates durable carbide tools and its significance. ↩
Understand the challenges of drilling hardened steel and how to overcome them with the right tools. ↩
Explore the significance of point geometry in achieving accurate and efficient drilling. ↩
Find out which drill bits are best suited for machining aluminum for optimal results. ↩
Discover the benefits of using a 135° split point drill for improved centering and cutting. ↩
Explore high-value brands that offer quality tools at competitive prices for cost-effective machining. ↩
Discover how to calculate ROI for tooling investments to ensure cost-effective purchasing decisions. ↩
Learn how to assess the total cost of ownership to make smarter tooling investments. ↩