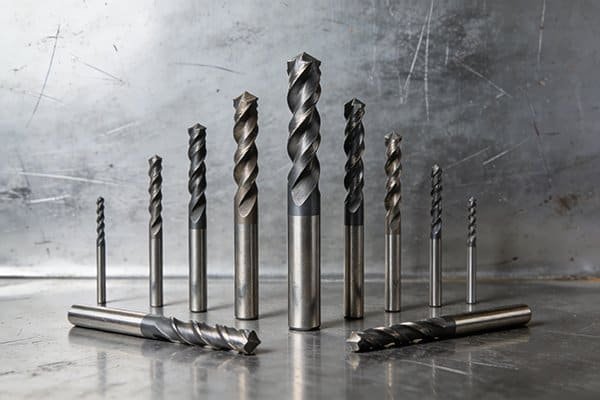
Choosing the wrong end mill1 can ruin your workpiece and waste money. You need the right tool shape for the job. This guide makes it simple to match the tool to the feature.
The shape of an end mill1's tip directly creates the final geometry of your machined feature. A flat end mill2l](https://nv-tool.com/how-do-you-choose-between-a-drill-and-an-end-mill/)%%%FOOTNOTE_REF_1%%% makes square corners, a ball end mill3l](https://nv-tool.com/how-do-you-choose-between-a-drill-and-an-end-mill/)%%%FOOTNOTE_REF_1%%% creates curved surfaces, and a radius end mill4l](https://nv-tool.com/how-do-you-choose-between-a-drill-and-an-end-mill/)%%%FOOTNOTE_REF_1%%% produces strong, rounded corners inside pockets. Each shape has a specific purpose.
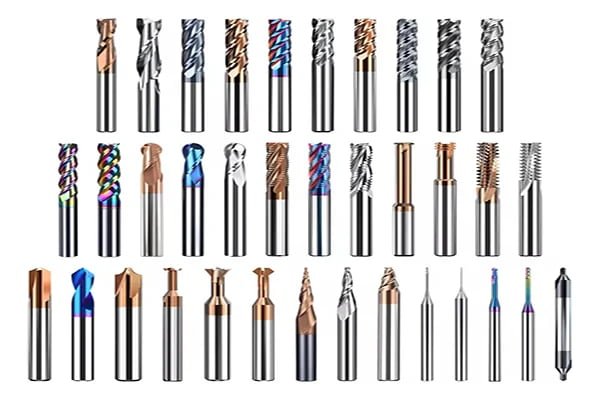
I've been in this business for a long time, and I've seen it all. The most common mistake new machinists make is grabbing the wrong tool for the job. The end mill1 isn't just a cutting tool; it's a shaping tool. The profile of its tip is what you'll see left behind in the metal. Understanding this basic idea is the first step to becoming a great machinist. Once you know which shape does what, you can machine almost any feature you can imagine. Let's break down the most common shapes and see exactly what they're used for.
When Do You Need a Perfectly Sharp 90-Degree Corner?
Need a perfectly square inside corner? Using the wrong tool will leave a radius, forcing you to scrap the part. A flat-bottom end mill1 is the only tool for this job.
For a perfectly sharp 90-degree corner5, you must use a flat-bottom end mill1, also known as a square end mill1. It is designed to create precise, square shoulders between the floor and the vertical wall of a slot, pocket, or contour.
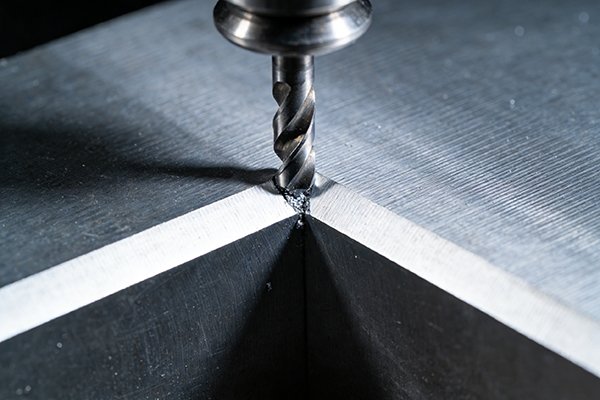
A flat-bottom end mill1 is the workhorse of any machine shop. As the name suggests, its end is perfectly flat, and its sides are perpendicular to the end face. This geometry is what allows it to machine a true 90-degree angle. From my years of experience, this is the first tool anyone learns to use. It's incredibly versatile. You can use it for profiling the outside of a part, cutting a keyway, or milling a flat-bottomed pocket. The number of flutes on the tool is also important. For softer materials like aluminum, we typically recommend a 2 or 3-flute tool to allow for big chips to fly out. For harder materials like steel, a 4-flute or multi-flute end mill1 provides a smoother finish and better tool life6.
| Application | Description | Recommended Tool |
|---|---|---|
| Profiling | Machining the outside perimeter of a part. | Flat-Bottom End Mill |
| Slotting | Creating a long, narrow channel in a workpiece. | Flat-Bottom End Mill |
| Pocketing | Hollowing out a cavity in a part. | Flat-Bottom End Mill |
How Do You Machine Smooth, Organic 3D Surfaces?
Machining complex curves and contours is tough. The wrong tool leaves ugly steps behind. A ball end mill3l](https://nv-tool.com/how-do-you-choose-between-a-drill-and-an-end-mill/)%%%FOOTNOTE_REF_1%%% is the secret to creating smooth, flowing surfaces in a single operation.
To machine smooth, organic 3D surfaces, you should use a ball end mill3l](https://nv-tool.com/how-do-you-choose-between-a-drill-and-an-end-mill/)%%%FOOTNOTE_REF_1%%%. Its fully rounded cutting tip is perfect for contouring, profiling, and finishing complex shapes like molds and dies. It creates a smooth, step-free surface when used with fine step-overs.
Think of the ball end mill3l](https://nv-tool.com/how-do-you-choose-between-a-drill-and-an-end-mill/)%%%FOOTNOTE_REF_1%%% as a sculptor's tool. It doesn't have any sharp corners. Instead, its entire tip is a perfect hemisphere. This unique shape allows it to get into tight curves and create the flowing surfaces you see on molds, dies, and artistic parts. When we machine a 3D surface, we often use a technique called "scalloping7," where the tool makes many fine, overlapping passes. The height of the "scallop" left between passes determines the final surface finish. With a ball end mill3l](https://nv-tool.com/how-do-you-choose-between-a-drill-and-an-end-mill/)%%%FOOTNOTE_REF_1%%% and a small step-over, you can achieve a surface that is almost perfectly smooth, requiring very little polishing later on. We often use these for finishing passes after a roughing tool has removed the bulk of the material. It's the tool that adds the final, beautiful details to a complex part.
Key Applications for Ball End Mills:
- 3D Contouring: Creating complex, multi-axis surfaces.
- Filleting: Machining a rounded internal corner.
- Mold & Die Making: Essential for creating the cavities in injection molds.
- Turbine Blade Machining: Perfect for the complex aerodynamic surfaces.
What's the Best Way to Create Stronger, Stress-Resistant Pockets?
Sharp inside corners are weak points in a part. They concentrate stress and can lead to cracks. A corner radius end mill4l](https://nv-tool.com/how-do-you-choose-between-a-drill-and-an-end-mill/)%%%FOOTNOTE_REF_1%%% solves this problem by adding strength where it's needed most.
The best way to create stronger pockets is to use a corner radius end mill4l](https://nv-tool.com/how-do-you-choose-between-a-drill-and-an-end-mill/)%%%FOOTNOTE_REF_1%%%, also known as a bull nose end mill1. It leaves a small, rounded fillet at the bottom of a wall, which distributes stress and makes the part much more durable.
A corner radius end mill4l](https://nv-tool.com/how-do-you-choose-between-a-drill-and-an-end-mill/)%%%FOOTNOTE_REF_1%%% is a hybrid. It's like a flat-bottom end mill1, but with its sharp corners rounded off. This small change makes a huge difference. In mechanical engineering, sharp inside corners are called "stress risers8." All the forces on a part tend to concentrate in these sharp corners, which is often where a part will fail. By using a bull nose end mill1, you machine a small radius, or fillet, at the base of the pocket wall. This fillet spreads the stress out over a larger area, making the entire part significantly stronger. This is critical in industries like aerospace and automotive, where part failure is not an option. From a machinist's perspective, it also makes the tool itself stronger, which we'll talk about next. In our factory, we always push customers toward using a corner radius whenever the design allows it.
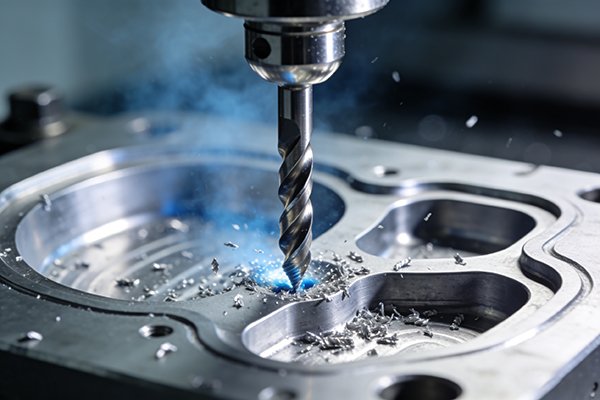
How Can You Hog Out Material Without Worrying About Chipping?
Aggressive roughing is tough on tools. Sharp corners on an end mill1 are the first thing to chip and break. Using a tool with a corner radius makes your tool much tougher.
To hog out material without chipping your tool, use an end mill1 with a corner radius. The rounded corners are much stronger than sharp 90-degree corner5s, allowing for higher feed rates and deeper cuts during aggressive roughing9 operations, especially in tough materials.
The weakest point of a standard square end mill1 is its sharp, 90-degree corner. All the cutting force is concentrated on that tiny point. During heavy roughing, it’s very easy for that corner to chip or break completely. A bull nose end mill1 solves this problem. By replacing that fragile corner with a smooth radius, we distribute the cutting force and impact over a larger area. This makes the tool dramatically stronger and more resistant to chipping. I've seen it myself countless times. Two identical tools, one square and one with a small corner radius, are put into the same roughing operation. The square end mill1 fails quickly, while the bull nose just keeps on cutting. This allows you to run the machine faster, take deeper cuts, and remove material more efficiently, saving you time and money. It's a simple change that has a massive impact on productivity.
Are You Machining a Draft Angle or a Chamfer?
Creating angled surfaces can be tricky. Using the wrong tool requires multiple setups and complex programming. Tapered and chamfer end mill10l](1s">https://nv-tool.com/how-do-you-choose-between-a-drill-and-an-end-mill/)1s create these features easily and accurately in a single pass.
For a draft angle on the side of a part, use a tapered end mill11l](https://nv-tool.com/how-do-you-choose-between-a-drill-and-an-end-mill/)%%%FOOTNOTE_REF_1%%%. For breaking a sharp edge with an angle, use a chamfer end mill10l](https://nv-tool.com/how-do-you-choose-between-a-drill-and-an-end-mill/)%%%FOOTNOTE_REF_1%%%. Each tool is specifically designed to create a precise angled surface, but for very different applications.
While both tools cut angles, they are not interchangeable. A tapered end mill11l](https://nv-tool.com/how-do-you-choose-between-a-drill-and-an-end-mill/)%%%FOOTNOTE_REF_1%%% is used to create a "draft angle" on the walls of a pocket or the outside of a part. This is very common in mold making. The slight angle allows the finished part to be easily ejected from the mold without getting stuck. These tools are defined by their angle per side, for example, a 3-degree tapered end mill11l](https://nv-tool.com/how-do-you-choose-between-a-drill-and-an-end-mill/)%%%FOOTNOTE_REF_1%%%.
A chamfer end mill10l](https://nv-tool.com/how-do-you-choose-between-a-drill-and-an-end-mill/)%%%FOOTNOTE_REF_1%%%, on the other hand, is used for creating a "chamfer" or a bevel on a sharp edge. This is done for several reasons: to remove a sharp burr, to create a lead-in for a bolt, or to prepare an edge for welding. They are typically available in standard angles like 45 or 60 degrees. Using the correct tool makes the job fast and precise, avoiding the need for complex 3D toolpaths.
| Tool Type | Primary Use | Common Application |
|---|---|---|
| Tapered End Mill | Creates an angled wall (draft). | Mold making, angled slots. |
| Chamfer End Mill | Creates a beveled edge (chamfer). | Deburring, countersinking, weld prep. |
Conclusion
Choosing the right end mill1 shape is key. Matching the tool to the feature saves time, improves part quality, and protects your tools. Let's make something great together.
Understanding end mills is crucial for selecting the right tool for your machining projects. ↩
Explore how flat end mills are essential for creating precise square corners in various machining tasks. ↩
Learn about the versatility of ball end mills for creating smooth, complex 3D surfaces. ↩
Discover how corner radius end mills enhance the strength and durability of machined parts. ↩
Find out the best practices for creating sharp corners to improve part quality. ↩
Explore strategies to enhance tool life and reduce costs in machining operations. ↩
Discover the scalloping technique for achieving smooth finishes in complex shapes. ↩
Learn about stress risers and their impact on the durability of machined parts. ↩
Understand the concept of aggressive roughing and how to choose the right tools. ↩
Learn about chamfer end mills and their role in creating beveled edges. ↩
Explore how tapered end mills are used for creating draft angles in machining. ↩