
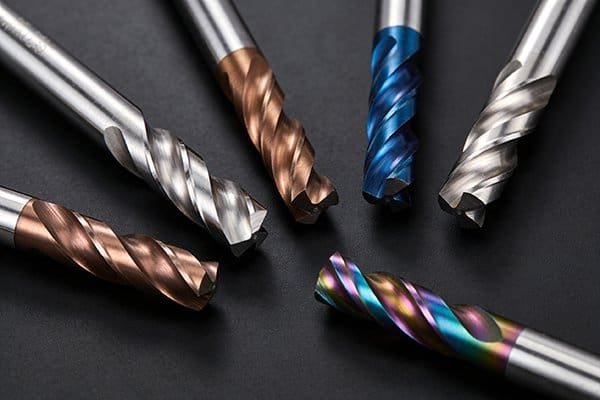
Picking the wrong end mill wastes time, ruins parts, and costs money. You need a simple way to choose the right tool for the job, every single time.
To choose a solid carbide end mill1 that maximizes performance, you must match the tool's specifications—flute count2, helix angle3, coating4, and geometry—to your specific workpiece material and machining operation5, whether it's roughing or finishing. This alignment is key to achieving optimal results.
I've been in the cutting tool business for over a decade, and I've talked to more than a thousand machine shops worldwide. The single biggest factor that separates a highly productive shop from an average one is how they select their tools. It's not about just grabbing any end mill that fits the holder. It's about a deliberate process. A small change in tool selection can be the difference between breaking even and making a great profit on a job. Let's break down this process so you can make the best choice every time and stop leaving money on the table.
Why Choose Solid Carbide Over HSS6 in the First Place?
You see that High-Speed Steel (HSS6) tools are cheaper, and you wonder if paying more for carbide is really worth it. But slow speeds and constant tool changes are frustrating.
Solid carbide is chosen over HSS6 for its superior hardness and heat resistance. This allows you to run at much higher speeds and feeds, machine harder materials, and get significantly longer tool life7, which boosts your shop's overall productivity and lowers your cost-per-part.
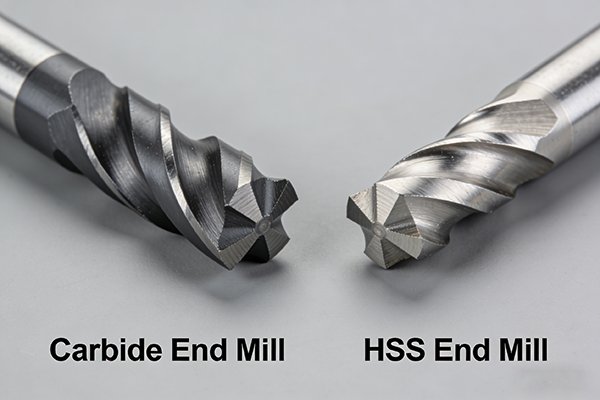
Let's get into the details. The core of a solid carbide end mill1 is tungsten carbide8, a very hard particle, mixed with a cobalt binder. This combination gives it incredible rigidity and allows it to keep its sharp cutting edge9 even when it gets very hot. HSS6, on the other hand, will soften at much lower temperatures. This means you have to run it slower to prevent it from failing.
Think of it this way: HSS6 is a reliable workhorse for general jobs, manual machines, or situations where you need more toughness to prevent chipping. But for modern CNC machining10 where speed and efficiency are everything, solid carbide is the only real choice. The initial higher cost is quickly offset by faster cycle times, better surface finishes, and fewer tool changes. At our factory, we focus on producing top-tier carbide tools because that's what professional shops need to compete.
Key Differences: Carbide vs. HSS6
| Feature | Solid Carbide | High-Speed Steel (HSS6) |
|---|---|---|
| Hardness | Extremely High | Good |
| Heat Resistance | Excellent | Fair |
| Max Cutting Speed | Very High (4-10x HSS6) | Low to Medium |
| Rigidity | Very Stiff, Low Vibration | More Flexible, Tougher |
| Best For | Hard Materials, High-Speed Machining | Soft Materials, Manual Mills |
How Does Flute Count Affect Your Material Removal Rate?
Choosing between a 2, 3, or 4-flute end mill can be confusing. The wrong choice leads to clogged flutes in soft metals or slow, chattering cuts in hard metals.
A lower flute count2, like 2 flutes, has more space for chip evacuation11 and is best for soft materials like aluminum. A higher flute count2, like 4 or more, provides a stronger tool and better finishes in harder materials like steel, increasing your material removal rate12.
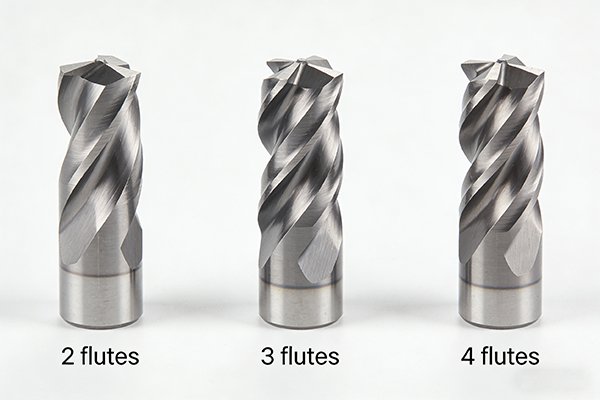
The number of flutes on an end mill directly impacts how it performs. It's a trade-off between chip evacuation11 space and the strength of the tool's core. More flutes mean a larger core diameter and a stronger tool, but smaller valleys (gullets) for chips to escape. Fewer flutes mean huge gullets for chips, but a weaker core.
Here is a simple way I explain it to our customers:
- 2-Flute End Mills: Think of these as shovels. They have massive space to scoop out big, soft chips from materials like aluminum, plastics, and wood without clogging. They are the top choice for slotting in these materials.
- 3-Flute End Mills: This is a great all-around option. It offers better chip evacuation11 than a 4-flute but is stronger than a 2-flute. It's very effective for both slotting and profiling in aluminum and can work well in steels.
- 4-Flute and Higher: These are for hard materials. With more cutting edge9s engaged with the workpiece, you get a much smoother surface finish. The stronger core handles the high cutting forces needed for steels, stainless steels, and exotic alloys. They are the standard for finishing operations.
What Helix Angle Is Best for Finishing vs. Roughing?
The term "helix angle3" sounds very technical and can be intimidating. But using the wrong angle can lead to tool chatter, a poor finish, or even pull the part out of your vise.
A high helix angle3 (45° or more) uses a shearing action for smooth cuts, making it best for finishing. A lower helix angle3 (around 30°) provides a stronger cutting edge9, making it better for roughing and machining tough materials where tool strength is critical.
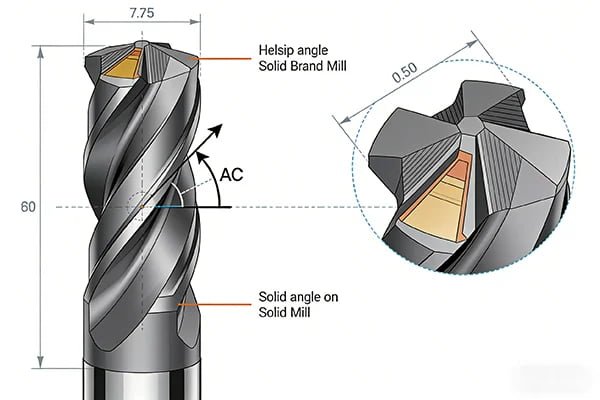
The helix angle3 is simply the angle of the cutting flute as it wraps around the tool. A higher angle creates a sharper, more aggressive "slicing" motion, while a lower angle creates more of a "chopping" motion. The effect this has on your machining is significant.
I've seen shops struggle with chatter on a finishing pass, and the fix was as simple as switching to a higher helix tool. Here’s how to think about it:
Helix Angle Breakdown
| Helix Angle | Primary Use | Key Characteristics |
|---|---|---|
| Low (~30°) | Roughing Hard Materials | Strongest cutting edge9, less lifting force. Good for tough steels and when holding thin-walled parts. |
| Standard (35°-40°) | General Purpose | A great balance between strength and finishing ability. This is the workhorse for many job shops. |
| High (45°+) | Finishing, Soft Materials | Smooth shearing action provides excellent surface finish. Aggressively pulls chips up and away, perfect for aluminum. |
A high helix angle3 is fantastic for finishing because it slices the material cleanly. This action also helps pull chips up and out of the cut, which is why it's a go-to for deep pocketing in aluminum. On the flip side, a low helix angle3 gives you a tougher, more durable edge that can withstand the heavy impact of roughing passes in difficult materials like stainless steel.
When Does a Coating Justify the Extra Cost?
You see that coated tools cost more and wonder if it's just a sales gimmick. But you also know that uncoated tools wear out fast, causing downtime and costing you money.
A coating4 is justified almost every time you are machining in a production environment. Coatings add hardness, lubricity, and heat resistance, which dramatically increases tool life7 and performance. This directly lowers your overall cost-per-part, making the initial investment worthwhile.

Think of a coating4 as a protective shield for your end mill. It’s a micro-thin layer of extremely hard ceramic material that is applied to the cutting edge9s. This shield does three things: it makes the tool harder, it makes it slicker so chips don't stick, and it acts as a thermal barrier to protect the carbide from heat.
In my experience, running an uncoated carbide tool in steel is like throwing money away. The tool will fail very quickly. The small extra cost for a quality coating4 pays for itself within the first few parts you make. At our company, we have invested heavily in our own PVD coating4 facilities because we know how critical the right coating4 is.
Here are a few common coating4s we use and what they are for:
- TiAlN (Titanium Aluminum Nitride): This is the workhorse for steel, stainless steel, and high-temp alloys. The aluminum in the coating4 forms a protective layer of aluminum oxide at high temperatures, which is like a ceramic shield.
- AlTiN (Aluminum Titanium Nitride): Similar to TiAlN but with a higher aluminum content, offering even better performance in high-heat applications and hard materials.
- DLC (Diamond-Like Carbon): This coating4 is incredibly slick. It's the absolute best choice for non-ferrous materials like aluminum because it prevents the gummy material from sticking to the cutting edge9 (known as built-up edge).
Which Design Is for General Purpose vs. High-Efficiency Milling?
You hear terms like "general purpose" and "high-efficiency milling13" (HEM) but aren't sure of the difference. Using a standard tool for an aggressive HEM toolpath can lead to tool breakage.
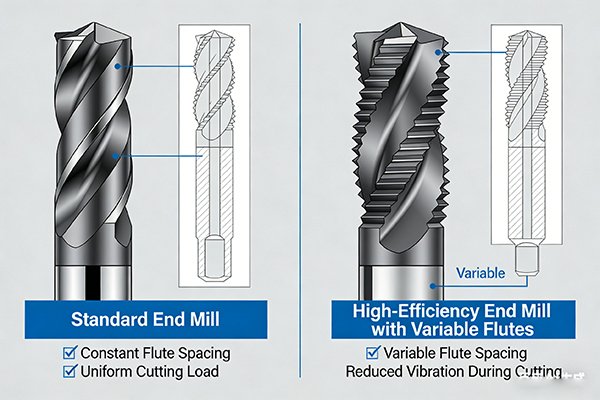
General-purpose end mills are designed for traditional, heavy-cut slotting and profiling. High-efficiency end mills have special features like variable helix14 flutes and are designed for modern, high-speed toolpaths with light radial cuts and deep axial cuts.
This is one of the biggest shifts I've seen in CNC machining10 over the last decade. It’s not just about the tool, but about matching the tool to the programming strategy.
General-Purpose (GP) End Mills are the tools most of us started with. They typically have a standard 30°-40° helix and an even spacing between the flutes. They are designed for taking a big, wide cut, like cutting a full-width slot in one pass. They are reliable and versatile, but they have their limits. Pushing them too hard creates a lot of tool pressure, heat, and chatter.
High-Efficiency Milling (HEM) End Mills are completely different. They are designed specifically for a CAM strategy that uses a very light width of cut (radial engagement) but a very deep length of cut (axial engagement), all at extremely high feed rates. To do this without chatter, these tools have unique designs:
- Variable Helix: Each flute has a slightly different helix angle3 to disrupt the cutting frequency and cancel out vibrations.
- Variable Pitch: The spacing between the flutes is unequal, which also breaks up harmful harmonics.
- More Flutes (5-7): Since the chip load per tooth is light, you can use more flutes to get a high feed rate.
Using a HEM toolpath with a GP end mill will likely cause it to chatter and fail. Using a HEM-specific end mill with the right toolpath can reduce cycle times by over 70%. It's a game-changer.
What's Your Final Selection Checklist Before You Buy?
You've learned a lot, but it's easy to forget one of these details when you're busy. Making a purchasing mistake is frustrating and costs your shop time and money.
Before buying, always confirm your: 1) Workpiece Material, 2) Operation (roughing/finishing), 3) Flute Count, 4) Helix Angle, 5) Coating, and 6) Tool Dimensions. This simple six-point check ensures you get the perfect tool for the job.

To make it easy, I tell our clients to run through this mental checklist before they place an order with us. It takes 30 seconds and can save you hours of headache later. I've personally walked customers through this list over the phone, and it often leads them to a tool that doubles their productivity.
Here is the checklist. Answer these questions every time:
- What material am I cutting? (e.g., 304 Stainless Steel, 6061 Aluminum, P20 Mold Steel). This is the most important question.
- What is the operation? (e.g., Roughing a deep pocket, finishing a thin wall, full-width slotting).
- How many flutes do I need? (2-3 for aluminum, 4+ for steels).
- What helix angle3 is best? (High for finishing and aluminum, standard or low for roughing steel).
- What coating4 do I need? (DLC for aluminum, AlTiN for steel, or something specialized).
- What are the critical dimensions? (Cutter Diameter, Length of Cut, Overall Length, and Shank Diameter). Make sure the tool can reach where it needs to without rubbing.
Going through this process turns tool selection from a guess into a science. It's how you unlock the full potential of your CNC machine. If you're ever unsure, our team at NV-Tool is always here to help you walk through it.
Conclusion
Choosing the right solid carbide end mill1 is not complicated. By matching the tool's features to your material and operation, you can dramatically boost performance, improve quality, and increase profitability.
Explore the advantages of solid carbide end mills for improved machining performance and tool longevity. ↩
Learn how different flute counts impact chip evacuation and material removal rates for various materials. ↩
Discover how helix angles influence cutting efficiency and surface finish in machining operations. ↩
Understand how coatings enhance tool performance and longevity, reducing overall costs in production. ↩
Explore various machining operations to determine the best tools for your specific tasks. ↩
Compare HSS and carbide tools to see which is best suited for your machining needs. ↩
Find effective strategies to maximize the lifespan of your cutting tools and reduce costs. ↩
Learn about tungsten carbide's properties and why it's preferred for cutting tools. ↩
Learn how the design of the cutting edge influences tool effectiveness and material removal. ↩
Get insights into CNC machining technology and its advantages in modern manufacturing. ↩
Understand the significance of chip evacuation for maintaining tool performance and preventing damage. ↩
Learn how to calculate material removal rates to optimize your machining processes. ↩
Understand the principles of high-efficiency milling and its impact on machining efficiency. ↩
Learn how variable helix designs improve cutting performance and reduce vibrations. ↩