Struggling with chatter and interference in deep cavities? Standard tools often fail, wasting time and material. A tapered ball nose end mill1 is the specific solution you've been missing.
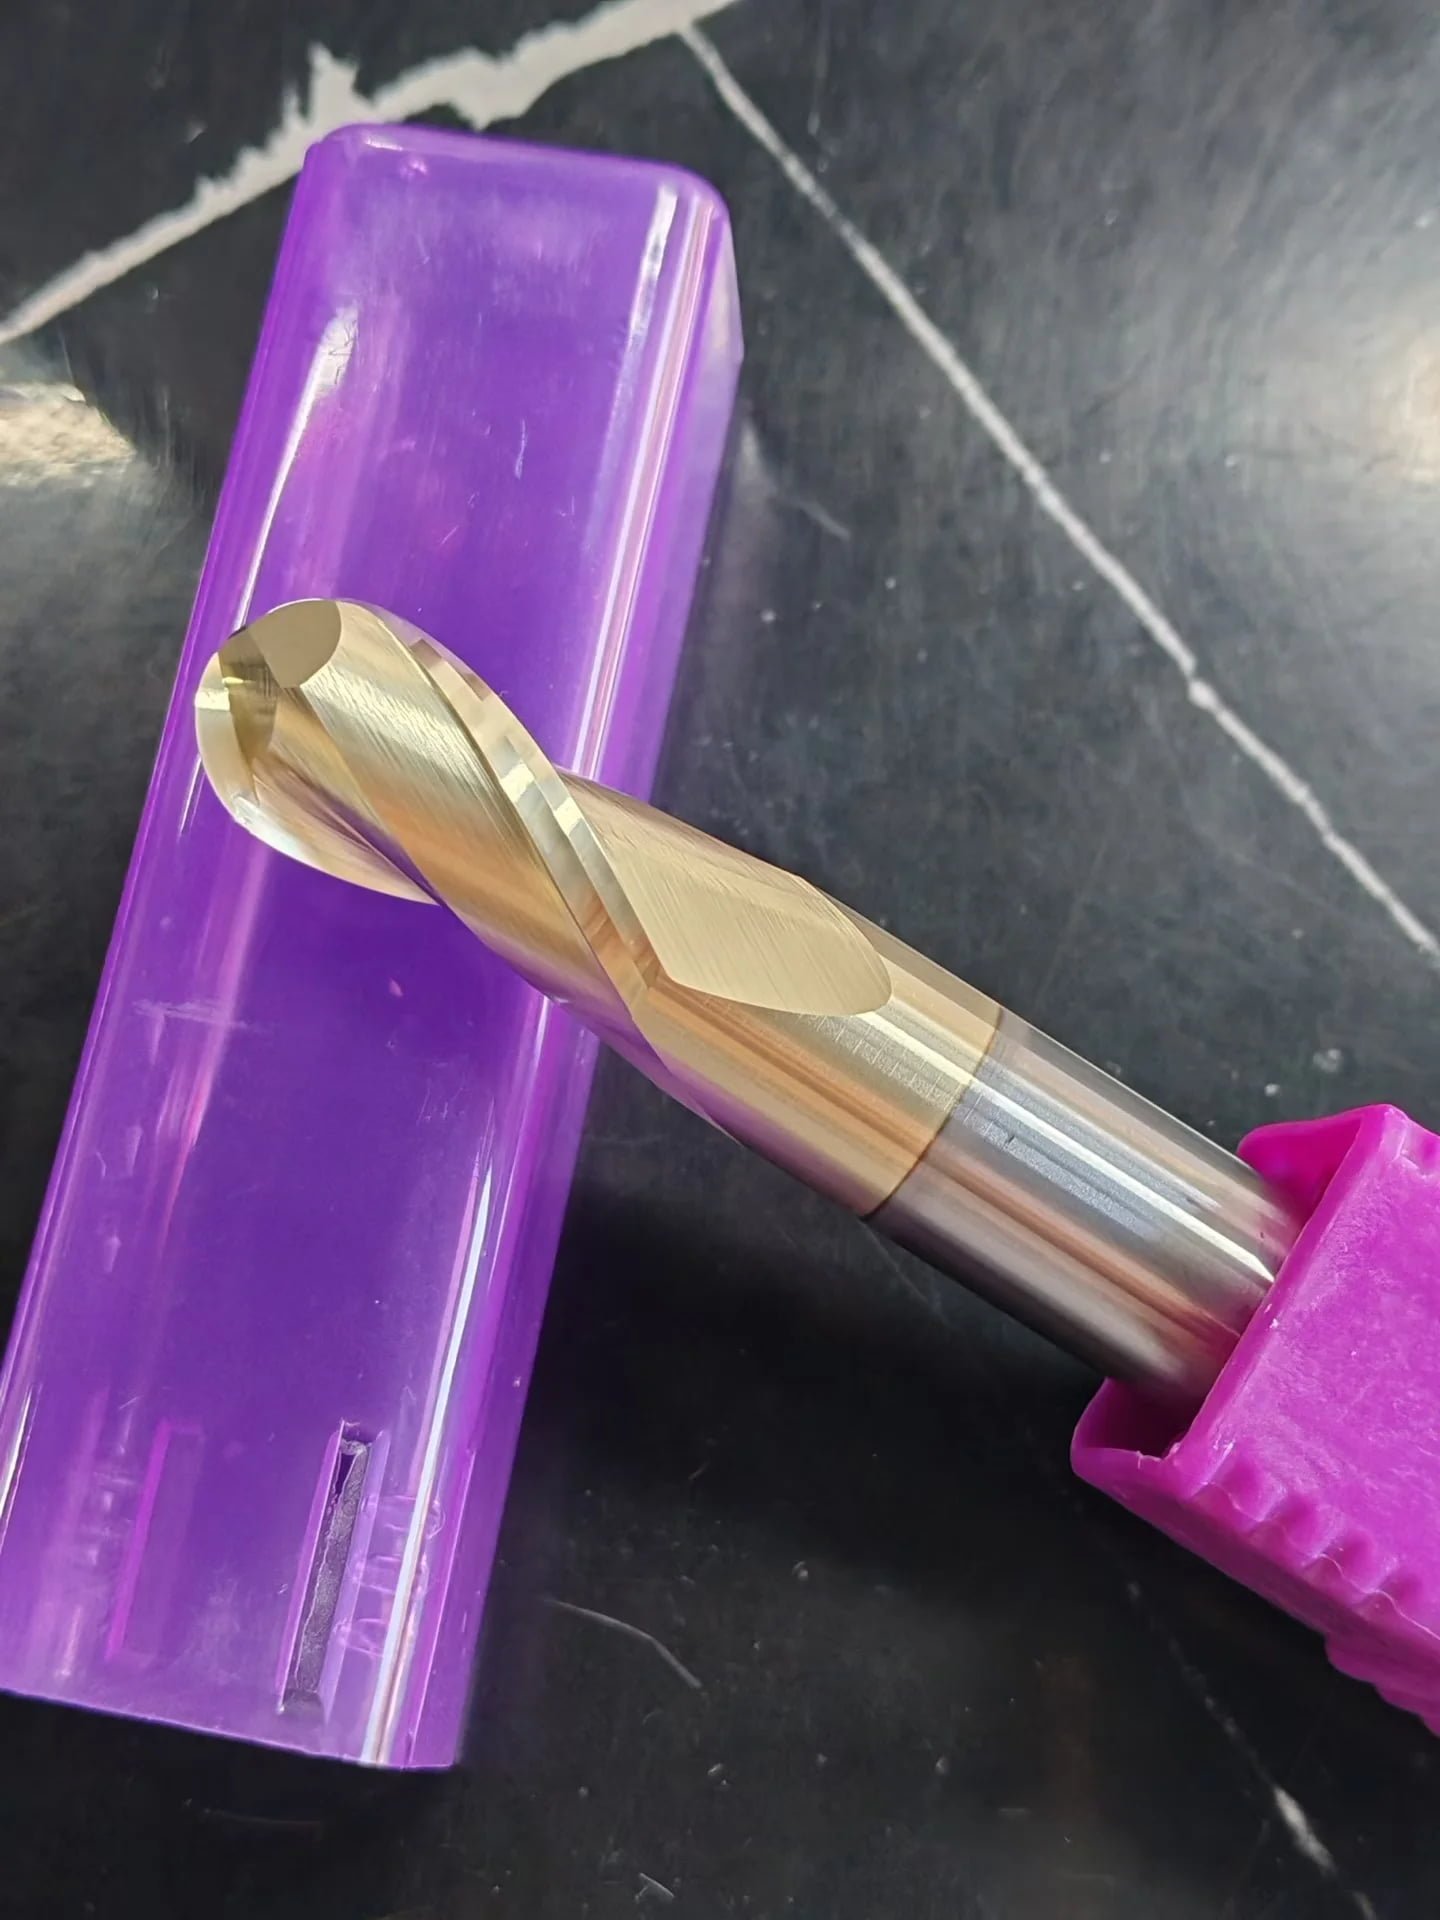
A tapered ball nose end mill1 is essential when machining deep, drafted cavities or complex 3D surfaces where a standard tool's shank would interfere with the workpiece. Its unique geometry provides the rigidity and clearance needed for these demanding applications, making it the only viable choice.
This tool looks a bit different, and that's because it does a very specific job exceptionally well. But what exactly makes it so special? Let's break down the problems it solves and why it might be the hero in your toolbox. Understanding its design is the first step to mastering it, so let's dive in.
What Unique Machining Problem Does This Tool Actually Solve?
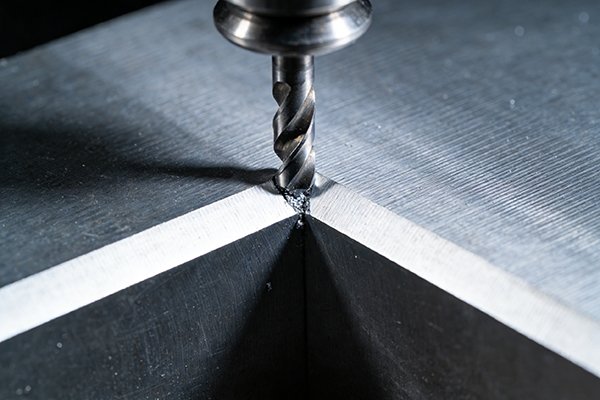
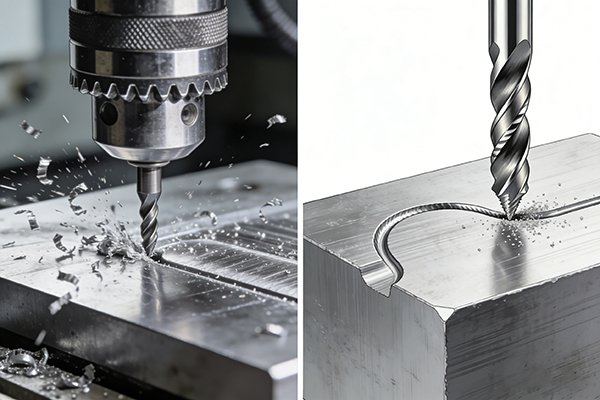
Ever had a straight end mill rub against the sidewall of a deep pocket? This interference ruins your part, breaks the tool, and forces you to use dangerously long, flimsy cutters.
This tool solves the critical problem of shank interference2 when machining deep cavities3 with drafted walls, common in mold making4. The taper provides clearance, allowing for a shorter, more rigid tool setup. This prevents rubbing, improves accuracy, and reduces tool breakage.
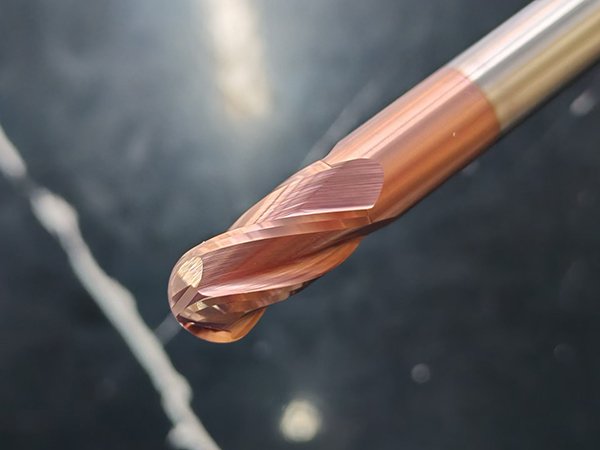
The main job of a tapered ball nose end mill1 is to solve two problems at once: reach and rigidity. When you're machining a deep pocket, especially one with walls that are not perfectly vertical (they have a draft angle), a standard straight-shank end mill creates a major headache. The shank of the tool will hit the top of the wall before the cutting tip reaches the bottom. The tapered design fixes this. The body of the tool gets narrower toward the tip, creating a natural clearance. This means you can reach deep into a part without the tool rubbing where it shouldn't.
The Rigidity Advantage
The tapered shape also makes the tool much stronger. Imagine a thin, straight stick versus a cone-shaped stick. The cone is much harder to bend. It's the same principle here. For the same cutting diameter at the tip, a tapered tool has a much thicker and stronger shank. This increased rigidity is a game-changer. It drastically reduces vibration (chatter), which leads to a better surface finish5, higher accuracy, and longer tool life6. You can often run the machine faster, too.
The Clearance Advantage
This is the most obvious benefit. The taper angle7 is specifically designed to avoid interference with drafted walls, which are common in parts made from molds.
| Feature | Straight Shank Ball Nose | Tapered Ball Nose |
|---|---|---|
| Shank Interference | High risk in deep pockets | Low risk due to taper |
| Rigidity (at length) | Low (prone to chatter) | High (thicker base) |
| Ideal Application | General 3D surfacing8 | Deep, drafted cavities |
| Tool Reach | Limited by shank diameter | Extended by taper clearance |
How Does the Taper Angle Affect Wall Finish and Tool Reach?
Choosing the right taper angle7 can feel like a guess. The wrong angle can lead to poor finishes or still cause interference, defeating the purpose of the tool. Understanding its dual role is key.
The taper angle7 directly creates clearance, allowing the tool to reach deeper into cavities without the shank rubbing the wall. A larger angle provides more clearance. This stability also reduces vibration, which is critical for achieving a smooth and precise final wall finish.
The taper angle7, often listed in degrees per side (e.g., 1°, 3°, 5°), is not just a random feature; it's a carefully chosen parameter that directly impacts how the tool performs. Its two primary functions are to extend effective reach and to improve the quality of the cut.
Taper Angle and Tool Reach
Think of the taper angle7 as a clearance creator. The larger the angle, the more space you have between the tool body and the workpiece wall. If you are machining a mold with a 5° draft angle, a tool with a 3° taper will give you plenty of room. This allows you to use a tool that is functionally shorter and therefore much more rigid to reach a deep feature. A standard tool would need to be extremely long and thin to do the same job, making it weak and prone to snapping. The taper lets you "cheat" by getting the strong part of the tool closer to the cut.
Taper Angle and Wall Finish
A better wall finish is a direct result of improved rigidity. Machining is all about managing vibration. A tool that chatters will leave a terrible, wavy finish on your part. Because the tapered design provides a much stronger tool body, it resists the cutting forces better and vibrates less. This stability transfers directly to the cutting edge, resulting in a cleaner, smoother shear of the material. A smooth cut means a beautiful finish, often reducing the need for secondary polishing or cleanup.
| Taper Angle | Clearance/Reach | Rigidity Impact | Typical Use Case |
|---|---|---|---|
| Small (0.5°-2°) | Moderate | High | Finishing passes, fine details |
| Medium (3°-5°) | Good | Very High | General purpose mold cavities |
| Large (8°+) | Excellent | Maximum | Aggressive roughing in deep pockets |
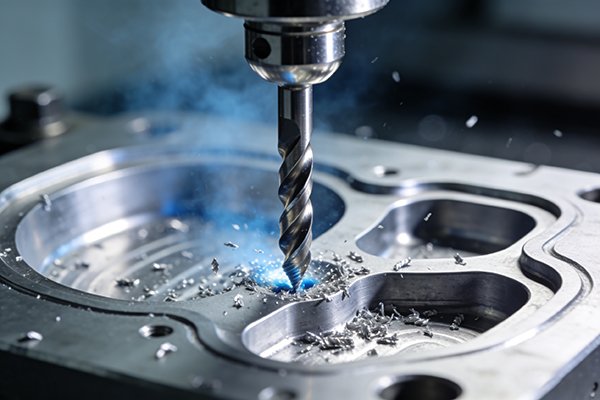
Why is the Ball Nose Geometry Critical for 3D Surfacing?
Trying to machine a smooth, curved surface with a flat end mill? It leaves ugly steps and requires tons of cleanup, completely missing the designer's intent. The ball nose is made for seamless 3D contours.
The hemispherical tip of a ball nose end mill allows for smooth, continuous toolpaths across complex 3D surfaces. It machines with point contact, which is perfect for creating the flowing curves and organic shapes found in molds and dies without leaving sharp steps.
The "ball nose" part of the name refers to the tool's perfectly round, hemispherical cutting tip. This geometry is not for cutting flat floors or sharp corners; it is a specialist tool for creating complex, three-dimensional surfaces. I remember working on a complex mold for a car dashboard once. A flat end mill would have been a disaster. The ball nose was the only way to get those smooth, ergonomic curves just right.
Eliminating the "Stair-Step" Effect
If you try to machine a curved surface with a flat-bottomed tool, the machine has to approximate the curve by cutting a series of tiny, flat steps. This is known as the "stair-step" effect. The result is a rough surface that requires a lot of hand finishing. A ball nose end mill solves this. Because its tip is round, it naturally blends each cutting pass into the next. While it still leaves very small scallops, they are much smoother and closer to the final desired surface, drastically reducing polishing time.
Versatility in CAM Programming
Modern CAM (Computer-Aided Manufacturing) software is designed to work perfectly with ball nose end mills. Programmers can use many different strategies, like raster, spiral, or 3D offset, to machine a surface. The software simply traces the desired surface with the center of the tool's tip. The round profile ensures a consistent and predictable cut no matter which direction the tool is moving. This makes it the absolute standard for any kind of 3D contouring or surfacing work.
How Do You Select the Right Taper, Diameter, and Reach for Your Project?
Overwhelmed by the catalog of tapered end mills9? Choosing the wrong specs means you either can't reach the bottom of your part or you're using a tool that's too weak. A simple process can guide you.
First, match the taper angle7 to your part's draft angle, ensuring the tool's angle is smaller. Next, choose the largest ball nose diameter that fits the part's smallest corner radii. Finally, select the shortest possible reach that can machine the deepest feature.

Choosing the right tool from a catalog can seem daunting, but it becomes easy if you break it down into a logical, step-by-step process based on your part's geometry. The golden rule in machining is always "use the shortest, most rigid tool possible," and this process helps you do just that.
Step 1: Determine the Taper Angle
Look at your CAD model. The first thing to check is the draft angle on the walls of the cavity you are machining. Your tool's taper angle7 must be less than the part's draft angle to ensure clearance. For example, if your part has a 3° draft, a tool with a 1° or 2° taper is a safe choice. Don't guess; always measure it in your software.
Step 2: Select the Ball Diameter
Next, inspect the smallest internal corners or fillets in your 3D model. The radius of the ball nose (e.g., an R5 tool has a 5mm radius) must be smaller than the smallest internal radius you need to machine. However, you should always choose the largest diameter tool that will fit. A larger diameter tool is stronger, more stable, and can remove material faster with a better finish.
Step 3: Calculate the Required Reach
Finally, measure the depth of the deepest feature you need to machine from where the tool can safely enter. Choose a tool where the "length of cut" or "reach" is just long enough to get the job done. Using a tool that is excessively long is a common mistake. Any extra length reduces rigidity and invites chatter.
| Selection Factor | Key Consideration | Rule of Thumb |
|---|---|---|
| Taper Angle | Part's draft angle | Tool Angle < Part Angle |
| Ball Diameter (R) | Smallest internal corner radius | Tool Radius < Corner Radius |
| Reach (Length) | Deepest feature depth | Use the shortest possible length |
What are the Ideal Applications (and Materials) for These Cutters?
Not sure if this specialized tool is right for your shop's work? Using it on the wrong job is an expensive mistake, but not using it when needed is a missed opportunity.
These cutters are ideal for mold and die manufacturing, especially for creating cavities with draft angles. They also excel at 3D contouring and machining complex aerospace parts. They work best in tool steels10 (P20, H13), aluminum, and even graphite for EDM electrodes.

While a tapered ball nose end mill1 is a specialized tool, it is absolutely essential in several high-value manufacturing industries. Its unique ability to machine deep, complex surfaces makes it indispensable for certain jobs.
Core Application: Mold & Die Making
This is the number one application. Nearly all injection molds, stamping dies, and forging dies are designed with drafted walls to allow the finished part to be removed easily. The tapered ball nose end mill1 is practically custom-made for machining these features. It can be used for both roughing out the bulk material and for creating a smooth, precise final surface inside the mold cavity. At our company, NV-Tool, we supply countless tools to mold makers for exactly this purpose.
Other Key Applications
Beyond molds, these tools are critical for:
- Aerospace: Machining complex structural components, turbine blades, and other parts with organic, flowing shapes where strength and precision are non-negotiable.
- Prototyping: Quickly and accurately creating detailed 3D models and functional prototypes from solid blocks of plastic or aluminum.
- Medical: Manufacturing custom implants and surgical tools that have complex, ergonomic surfaces.
Material Compatibility
With the right geometry and coating, these tools are very versatile. We recommend our PVD-coated series for a wide range of materials:
- Tool Steels: Excellent performance in pre-hardened steels like P20, H13, and S7, where the tool's rigidity is a major benefit.
- Aluminum Alloys: Can be run at very high speeds and feeds for rapid material removal in deep pockets.
- Graphite: Widely used to machine electrodes for Electrical Discharge Machining (EDM).
- Composites & Plastics: Creates smooth, clean surfaces without delaminating or melting the material.
Conclusion
The tapered ball nose end mill1 is an essential problem-solver. It provides the unique rigidity and clearance needed for deep, drafted 3D surfaces where standard tools simply cannot perform.
Explore this link to understand how tapered ball nose end mills can enhance your machining processes. ↩
Discover strategies to prevent shank interference and improve your machining accuracy. ↩
Learn effective techniques for machining deep cavities to improve your production efficiency. ↩
Find out which tools are essential for successful mold making in your projects. ↩
Discover techniques to improve surface finish and reduce post-processing work. ↩
Explore the factors that influence tool life and how to extend it in your operations. ↩
Explore the impact of taper angle on machining efficiency and tool selection. ↩
Discover best practices for 3D surfacing to enhance your machining projects. ↩
Explore the benefits of tapered end mills for specialized machining tasks. ↩
Discover best practices for machining tool steels to improve your outcomes. ↩