Breaking your first end mill is frustrating and expensive. It stops your project cold and makes you question your skills. I'll show you how to pick the right one.
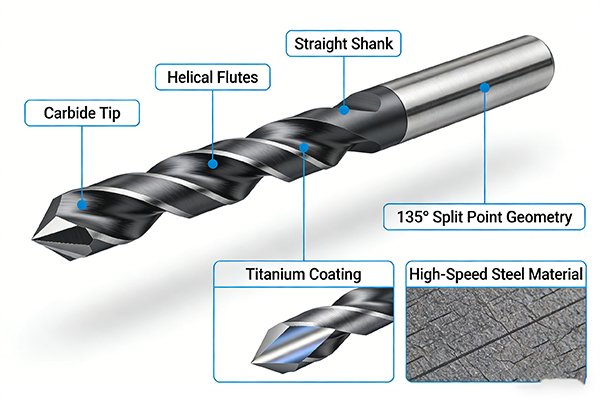
For beginners, the best first end mill is a 4-flute1, 35-degree helix2, general-purpose solid carbide end mill3 with a TiAlN coating4. It is versatile enough for steel and aluminum and forgiving of common mistakes. This guide will explain why and how to use it.
I've been in this business since 2012, and I've seen countless new machinists make the same simple mistakes. It's not about being a genius; it's about understanding a few basic rules. Breaking tools is part of learning, but it doesn't have to be a constant headache. Let's walk through this together, and I promise you'll feel much more confident by the end. I want to help you get cutting and making parts, not just making scrap.
Why Do Beginners Break Their First End Mill?
You set up your machine perfectly, but then the end mill snaps. It's a common, costly problem. Let's find out exactly why this happens so you can avoid it.
Beginners often break end mills by using the wrong speeds and feeds5, taking too deep a cut, or choosing the wrong tool for the material. Poor chip evacuation6 and a lack of machine rigidity7 are also major culprits. Understanding these mistakes is the first step to success.
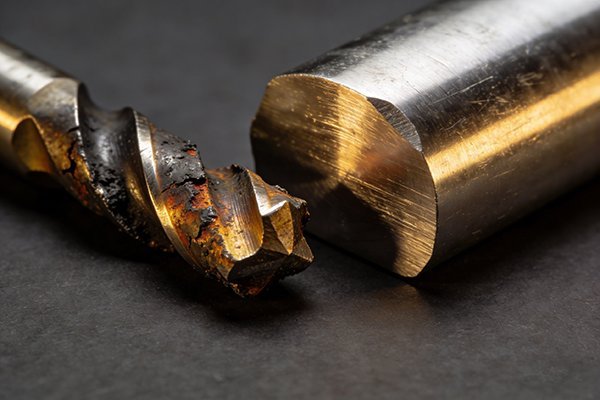
Let’s go deeper into the common reasons a new end mill meets an early end. First is "speeds and feeds5." This just means how fast the tool spins (RPM) and how fast you move it through the material (feed rate). If you spin it too slow and push it too fast, it breaks. If you spin it too fast and move it too slow, it gets too hot, gets dull, and then breaks. Second is taking too big of a "bite," or depth of cut8. Imagine trying to eat a whole apple in one bite. You can’t. An end mill is the same. Small, controlled cuts are safe. A huge, deep cut puts too much force on the tool, and it will snap. Another big one is chip evacuation6. The little metal shavings have to go somewhere. If they get clogged in the flutes, they jam up, create a ton of heat and pressure, and break the tool. Finally, your machine must be solid. If your machine or your part is wobbly, that vibration will kill an end mill instantly.
What Are the Only 3 Questions You Need to Answer?
Choosing an end mill feels overwhelming with so many options. You look at a catalog and see hundreds of choices. I will simplify it down to just three essential questions.
Before buying any end mill, just ask yourself these three things: 1. What material am I cutting? 2. What kind of cut am I making (roughing or finishing9)? 3. What is my machine's capability? Answering these will narrow your choices and lead you to the perfect tool.
These three questions are the foundation of every good machining decision I make. Let's break them down.
1. What material am I cutting?
This is the most important question. A tool designed for aluminum will fail instantly in hardened steel. We use a simple color-coded system based on ISO standards10 to make this easy.
- P-Class (Blue): This is for steel. These tools have good toughness to handle the demands of cutting steel alloys.
- K-Class (Red): This is for cast iron and non-ferrous metals like brass or bronze. The tool material is designed to resist abrasive wear.
- M-Class (Yellow): This is a general-purpose choice, good for both steel and cast iron. It's a flexible option.
- S-Class (No standard color, but often high-performance): This is for tough stuff like stainless steel, titanium, or very hard steels (HRC>45). These tools are made from an ultra-fine carbide that resists heat and chipping.
2. What kind of cut am I making?
Are you removing a lot of material quickly (roughing) or are you creating a beautiful, smooth surface (finishing)? The tool geometry11 is different for each. A roughing end mill is built strong, like a bulldozer. A finishing end mill is built sharp and precise, like a surgeon's scalpel.
3. What is my machine's capability?
A small desktop CNC router does not have the power or rigidity of a large industrial VMC. You must match the tool to the machine. Using a large, aggressive end mill on a small, flexible machine is a recipe for disaster. It will cause vibration and chatter, leading to a broken tool and a bad surface finish. Be honest about what your machine can handle.
How Do You 'Read' an End Mill's Product Title?
Product names like "HRC5512 4F-D10-R1-25-75" look like a secret code. You might just ignore the details. I'll teach you how to decode them so you can buy with confidence.
An end mill's title contains its key specifications. It usually includes the material hardness rating13 (HRC), number of flutes14 (F), diameter (D), corner radius15 (R), flute length, and overall length16. Understanding this code helps you quickly find the exact tool you need.
Let's decode a typical product name you might see on our website or in a catalog. It seems complex, but each part tells you something critical. This knowledge turns a confusing list of products into a clear menu where you know exactly what to order.
Let's use this example: HRC5512 4F D10 R0.5 L25 OAL75
| Code | Meaning | What It Tells You |
|---|---|---|
| HRC5512 | Hardness Rating | This tool is designed to cut materials with a hardness up to 55 on the Rockwell C scale. This is for hard steels. |
| 4F | Number of Flutes | This end mill has 4 cutting edges (flutes). A good general number for steels. |
| D10 | Diameter | The cutting diameter of the tool is 10 millimeters. |
| R0.5 | Corner Radius | The corners are not perfectly sharp but have a 0.5mm radius. This makes the corner much stronger and less likely to chip. |
| L25 | Length of Cut | The maximum depth you can cut in a single pass is 25 millimeters. |
| OAL75 | Overall Length | The total length of the tool from tip to end of the shank is 75 millimeters. This helps you check for clearance. |
Once you understand this simple structure, you can look at any end mill and know its purpose instantly. You'll know if it's strong enough for your material, big enough for your feature, and if it will fit in your machine without hitting anything. It’s like learning to read a new language, and it makes you a much smarter machinist.
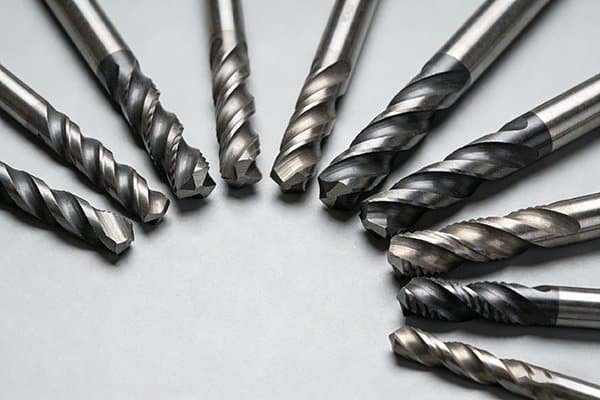
So, What Is the 'Swiss Army Knife' End Mill for Beginners?
You want one tool that can do a lot without breaking the bank. Buying a dozen specialized tools is confusing and expensive. Here is the one versatile end mill every beginner should own.
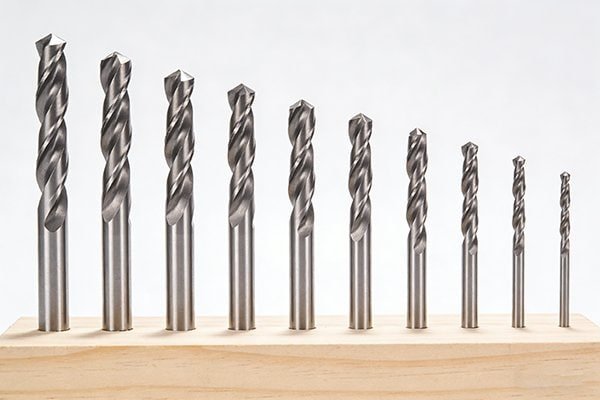
The ideal beginner's end mill is a solid carbide, 4-flute1 tool with a 35° or 45° helix angle and a general-purpose TiAlN coating4. A diameter between 6mm and 12mm (or 1/4" to 1/2") is a great starting point for most hobbyist and job shop machines.
Let's talk about why this specific combination is my top recommendation for anyone starting out. It’s all about creating a forgiving tool that gives you the best chance of success.
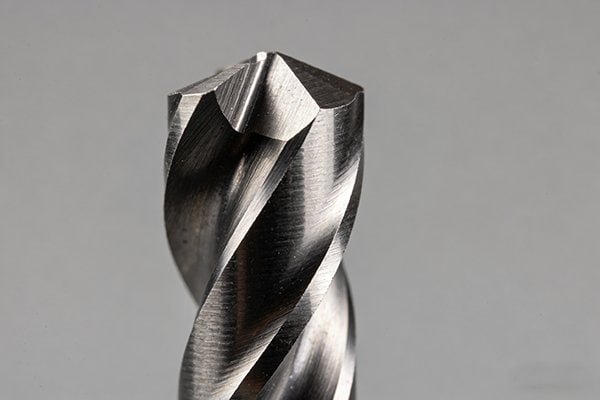
First, Solid Carbide. We make the entire tool from a single piece of tungsten carbide. This gives it the ultimate stiffness. For a beginner, this is huge. A stiff tool vibrates less, which means it's less likely to chatter and break. Indexable tools are great for production, but they have more parts and are less rigid, making them less forgiving.
Second, 4 Flutes. This is the perfect middle ground. For steel, it provides enough cutting edges for a smooth finish. For softer materials like aluminum, you can still use it effectively by adjusting your cutting parameters. Two flutes would be better for aluminum, and six would be better for finishing steel, but four does a good job at both.
Third, a 35° or 45° Helix Angle. The helix is the spiral of the flutes. A higher angle, like 45°, makes the cutting action smoother and helps pull chips up and out of the cut. This is critical for preventing chips from getting packed in, which is a very common way beginners break tools.
Finally, the TiAlN Coating. This is a fantastic general-purpose coating. When it gets hot during cutting, it forms a super-hard layer of aluminum oxide on the surface. This protects the carbide underneath. Since beginners often struggle with getting their speeds and feeds5 perfect, this thermal protection acts as a safety net, dramatically increasing the tool's life.
Conclusion
Choosing your first end mill is simple. Focus on your material, the type of cut, and use our recommended 'Swiss Army Knife' tool. You'll avoid breakage and start machining successfully.
Explore the advantages of 4-flute end mills for improved cutting efficiency and versatility. ↩
Learn how the helix angle influences cutting action and chip evacuation for better machining results. ↩
Discover why solid carbide end mills are preferred for their durability and performance in machining. ↩
Understand the benefits of TiAlN coating for heat resistance and tool longevity in machining. ↩
Get insights into how speeds and feeds impact tool performance and prevent breakage. ↩
Explore the significance of effective chip evacuation in maintaining tool performance and preventing damage. ↩
Discover the role of machine rigidity in achieving accurate cuts and preventing tool breakage. ↩
Learn how controlling depth of cut can prevent tool breakage and improve machining outcomes. ↩
Learn about the distinct characteristics of roughing and finishing cuts for better tool selection. ↩
Get familiar with ISO standards that guide the selection of cutting tools for various materials. ↩
Explore how different tool geometries impact cutting efficiency and surface finish. ↩
Understand the significance of HRC55 in determining the suitability of end mills for hard materials. ↩
Understand how material hardness ratings help in selecting the right end mill for your project. ↩
Discover how the number of flutes influences cutting speed and finish quality. ↩
Learn how corner radius affects tool strength and cutting performance. ↩
Understand how overall length impacts tool clearance and machining capabilities. ↩