Choosing the right milling tool1 feels overwhelming. A bad choice wastes time and money. A clear strategy makes your selection simple and effective, giving you perfect results every time.
Your milling strategy starts with your goal. First, decide if you need fast material removal2 or a perfect finish. Then, match the end mill's geometry3, grade, and coating to your specific material and toolpath4. This ensures efficiency and quality.
That's the big picture. But the real power is in the details. When we help our clients, we break this down into a simple, step-by-step process. Let's walk through it together, starting with the first and most important question you need to ask.
Are You Removing Material Fast or Chasing a Perfect Finish?
Are you trying to hog out a lot of material quickly? Or do you need a mirror-like surface? The tool you need for each job is completely different. Let's find the right one.
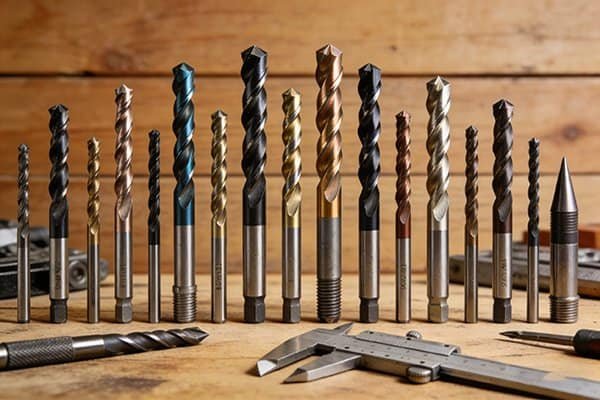
For fast material removal2, or roughing, use an indexable carbide end mill5. It is strong and economical. For a perfect surface, or finishing, choose a solid carbide end mill6. It offers the best stiffness and precision.
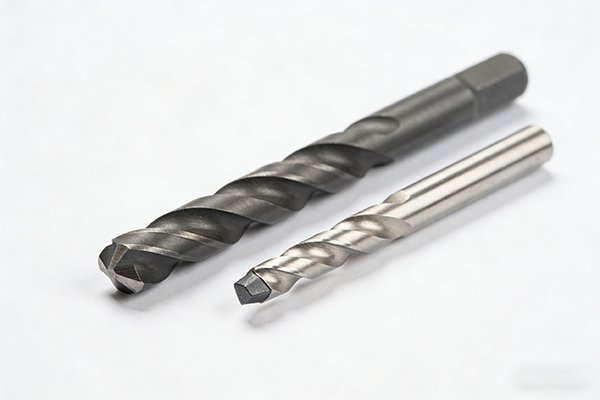
Your first decision is always about your primary goal: speed or precision. This choice points you toward one of two main types of end mills. For roughing, where the goal is to remove the maximum amount of material in the minimum amount of time, indexable carbide end mill5s are usually the best choice. The inserts are replaceable, so you don't have to discard the entire tool body. This makes them very cost-effective for heavy-duty work. For finishing, where surface quality and dimensional accuracy are critical, solid carbide end mill6s are superior. Because the entire tool is made from a single piece of carbide, it has incredible rigidity. This stiffness reduces vibration and allows for extremely precise cuts, which is essential for achieving a high-gloss finish.
Roughing vs. Finishing Tools
| Tool Type | Best For | Key Characteristics | Main Advantage |
|---|---|---|---|
| Indexable End Mill | Roughing | Replaceable inserts, steel body | Economical for high-volume removal |
| Solid Carbide End Mill | Finishing | Single-piece carbide construction | Ultimate stiffness and precision |
What Path Will Your End Mill Follow?
Your tool's path creates different forces on the cutter. A tool that excels at carving a deep slot might struggle with a delicate profile. You need to match the tool to the path.
Slotting cuts a full-width channel and is very demanding on the tool. Profiling machines an outer contour and is less stressful. Use rugged, strong tools for slotting and versatile, sharp tools for profiling7.
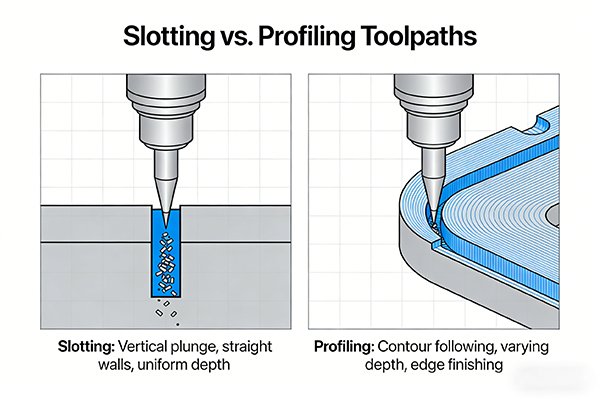
After you know your goal, you need to think about the tool's journey. Will it be creating a slot or a profile? Slotting, or full-width cutting, is one of the most demanding milling operations. The end mill is engaged with the material on three sides, which generates a lot of heat and makes chip evacuation difficult. This requires a tool with excellent strength and a geometry designed to clear chips effectively. Profiling, on the other hand, involves machining around the outside of a part. The tool is engaged along its side, which is a much less aggressive cut. This gives you more flexibility in your tool choice. You can use tools designed for high-speed finishing or more robust tools for heavy profiling7, depending on how much material you need to remove from the part's perimeter. Understanding this path is key to preventing tool breakage and achieving good results.
Which End Mill Geometry Matches Your Path and Goal?
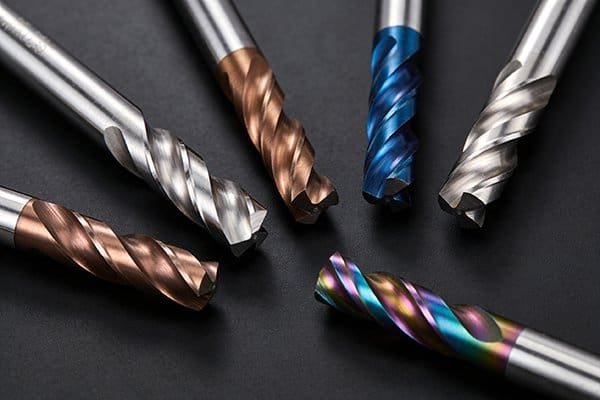
Two end mills can look very similar but perform completely differently. The secret is in their geometry—the angles and shapes of the cutting edges. Let's see how geometry changes your cut.
For solid mills, a larger helix angle8 gives a smoother cut and better chip removal. For indexable inserts, choose a geometry for your task: 'Sharp' for finishing, 'Rugged' for heavy roughing, and 'General Purpose' for a balance.
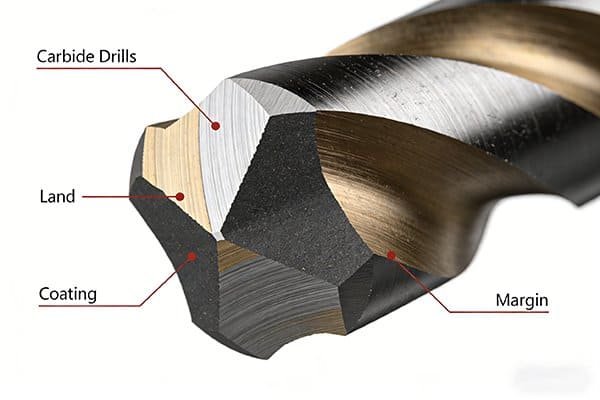
Geometry is where we fine-tune the tool for the specific job. For solid carbide end mill6s, the helix angle8 is a critical feature. This is the angle of the flutes as they wrap around the tool. A higher helix angle8, like 40 degrees or more, results in a smoother, shearing cut. It also helps lift chips out of deep pockets or slots more effectively. Another important feature is the cutting edge treatment9. We apply a tiny, precise rounding to the cutting edge, a process called passivation. This removes micro-defects and makes the edge much stronger, which dramatically increases tool life, especially in tough materials. For indexable inserts, we design different geometries for different tasks. A 'Sharp' geometry has a positive rake angle for light, clean cuts in finishing. A 'Rugged' geometry has a strong negative rake angle to withstand the high impact of heavy roughing and interrupted cuts.
How Do You Fine-Tune Your Process for a Flawless Result?
You have chosen your tool type and geometry, but the workpiece material is fighting back. The final step is matching the tool's core material and coating to what you're cutting.
Match the carbide grade10 to your material (e.g., K for cast iron, S for hardened steel). Then, select a coating. TiAlN is great for steel, while diamond coatings11 are for aluminum. Never use diamond on iron-based metals.
The final step in your strategy is matching the tool's composition to the workpiece material. This involves two key elements: the carbide grade10 and the coating. The grade refers to the carbide itself—the mix of tungsten carbide grains and cobalt binder. We use different grades for different materials. For example, our S-class grade uses ultrafine grains, making it tough enough to cut hardened steels above HRC 45. The coating is a micro-thin layer applied to the tool's surface that acts like armor. It increases hardness and reduces friction. A TiAlN coating12 is the go-to choice for steel because it forms a protective layer at high temperatures, perfect for dry cutting. For non-ferrous materials like aluminum or graphite, a diamond coating is incredibly effective due to its low friction. However, you must never use a diamond coating on steel, as the carbon in the diamond will react with the iron and cause the coating to fail instantly.
Matching Grade and Coating to Your Material
| Workpiece Material | Recommended ISO Grade | Recommended Coating |
|---|---|---|
| Steel, Stainless Steel | P-Class, M-Class | TiAlN / AlTiN |
| Hardened Steel (>HRC 45) | S-Class | TiSiN or TiAlN |
| Cast Iron | K-Class | Uncoated or TiAlN |
| Aluminum, Copper, Graphite | K-Class | Diamond Coating |
Conclusion
Define your goal, understand your path, choose the right geometry, and fine-tune with the right grade and coating. This four-step strategy ensures you select the perfect tool for every job.
Explore expert insights on choosing the right milling tool to enhance your machining efficiency. ↩
Discover effective strategies to enhance material removal rates for better productivity. ↩
Learn how different geometries can optimize your machining processes for better results. ↩
Explore the relationship between toolpath and tool selection for optimal machining results. ↩
Discover the benefits of indexable carbide end mills for cost-effective and efficient material removal. ↩
Find out why solid carbide end mills are preferred for achieving high precision and quality finishes. ↩
Learn about profiling techniques and their applications in various machining scenarios. ↩
Discover how helix angle impacts cutting performance and chip removal efficiency. ↩
Find out how cutting edge treatment enhances tool life and performance in machining. ↩
Get insights on selecting the appropriate carbide grade for different materials. ↩
Understand the applications of diamond coatings for non-ferrous materials. ↩
Learn how TiAlN coating improves tool performance and longevity in machining. ↩