Are you tired of scrapped parts and broken tools? A failed job costs time and money, pushing your deadlines and profits further away. It feels like a constant battle.
A winning machining strategy1 starts with understanding your material, tool, and machine as one complete system. The right tool choice2, combined with a rigid setup3 and optimized parameters, is the foundation for success.
I've been in this business for over a decade, and I've seen countless shops struggle with the same problems. They focus on just one thing, like cutting speed, but they forget about everything else. A great strategy is not about one magic number. It is about a series of smart decisions that work together. It's about building a process that is stable, predictable, and profitable. Let's break down the key questions you need to ask to build your own winning strategy.
How Does Your Material Dictate the Entire Machining Approach?
You have a new job, but the material is tough. You worry that your standard tools will fail, causing delays and wasting expensive stock. This uncertainty is stressful and costly.
Your first step is to match the tool's core material, its grade, to the workpiece material. This choice influences every other decision you make, from speeds and feeds4 to tool life expectations5.
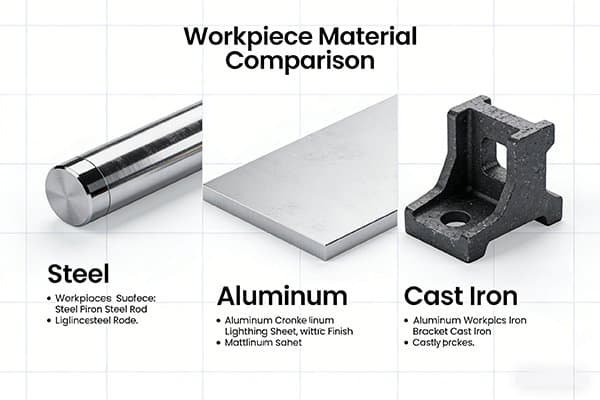
The material you are cutting is the boss. It tells you what to do. At our factory, NV-Tool, we live by this rule. We don't just grab any end mill. We start by looking at the material and then we choose the right carbide grade6. The grade is the foundation of the tool. It's made of tungsten carbide grains and a cobalt binder. The size of those grains and the amount of cobalt determine how the tool will behave. The ISO system7 gives us a simple roadmap. We use color codes to make it easy. For example, if we are cutting cast iron, we look for the K-class grade, marked with red. For steel, we need a P-class grade, marked with blue. This simple step prevents so many problems. Using the wrong grade is like trying to run a race in flip-flops. You might start, but you won't finish well.
| ISO Code | Color | Primary Application | Key Characteristic |
|---|---|---|---|
| P | Blue | Steels | Good toughness and heat resistance. |
| M | Yellow | Stainless Steels, Steel, Cast Iron | A versatile, all-around performer. |
| K | Red | Cast Irons, Non-Ferrous | Excellent wear resistance. |
| S | Orange | Superalloys, Titanium | High hot hardness and toughness. |
How Do You Maximize Rigidity from the Spindle to the Cutting Edge?
You hear a terrible noise from the machine. It's chatter. You know this vibration8 is killing your tool life and leaving a terrible surface finish9 on your part.
Maximize rigidity by using the shortest, thickest tool possible and ensuring your tool holder and workholding are rock-solid. A rigid setup3 is a quiet, productive, and precise setup.
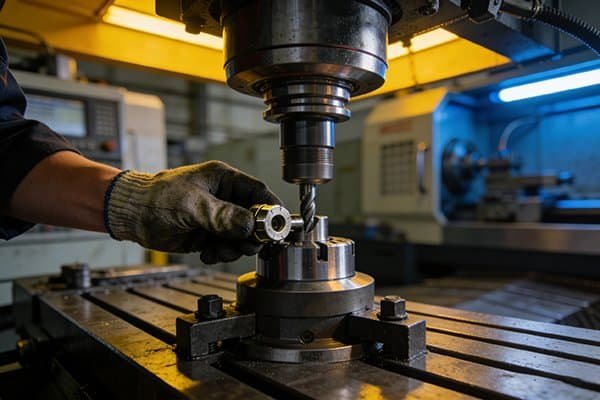
When I walk through a machine shop, I can often spot a potential problem just by looking at the tool setup. A long, skinny tool sticking way out of the holder is a red flag for vibration8. Rigidity is a chain, and it is only as strong as its weakest link. That chain starts at the machine's spindle, goes through the tool holder, into the tool itself, and ends at the workpiece clamped to the table. We think about this a lot when we design our tools. For ultimate stiffness, nothing beats a solid carbide end mill. The entire tool is one solid piece of carbide, so there are no joints to flex or vibrate. This makes them perfect for high-precision finishing. But for heavy roughing, an indexable end mill10 with a strong steel body might be a better choice. The key is to think about the whole system. Use a high-quality tool holder, keep the tool overhang as short as possible, and make sure your part is clamped down securely. A rigid setup3 lets the cutting edge do its job without fighting vibration8.
How Do You Balance Speed, Feed, and Depth of Cut?
You are trying to find the sweet spot. Too slow, and you're not making money. Too fast, and you burn up your tool. It feels like a guessing game you can't win.
Balance your parameters by starting with the tool manufacturer's recommendations. Then, consider the tool's coating and geometry. A modern coating allows for higher speeds, while a strong geometry can handle a heavier feed.
I remember a customer who kept burning through tools on a tough, heat-resistant alloy. He was running it too slow, thinking he was saving the tool. The problem was, the heat wasn't going into the chip; it was soaking into the tool and killing it. The secret is often in the tool's coating. A coating is a very thin, very hard layer on the tool's surface. Think of it like armor. A coating like TiAlN is amazing for steel. At high temperatures, it creates a protective layer of aluminum oxide. This means it actually works better when it's hot. So, you can increase your speed, which makes the chips carry the heat away. This is perfect for dry machining. For extremely hard materials, over HRC 60, we recommend a TiSiN coating. It has even higher hardness. The tool's geometry also plays a huge part. A sharp insert is great for finishing with a light depth of cut11. But for heavy roughing, you need a rugged insert with a stronger edge to handle the high feed rates. It is not just one number; it is a combination of speed, feed, and depth of cut11 that works with your tool's specific design.
What Should You Do When You Hear Chatter or See a Poor Finish?
You just finished a part, but the surface looks wavy and rough. Or worse, you hear that high-pitched squeal of chatter during the cut. You know the part is probably scrap.
When you encounter chatter or a poor finish, first reduce your depth of cut11 or feed rate. Then, check your entire setup for a lack of rigidity, from the tool holder to the workpiece clamping.
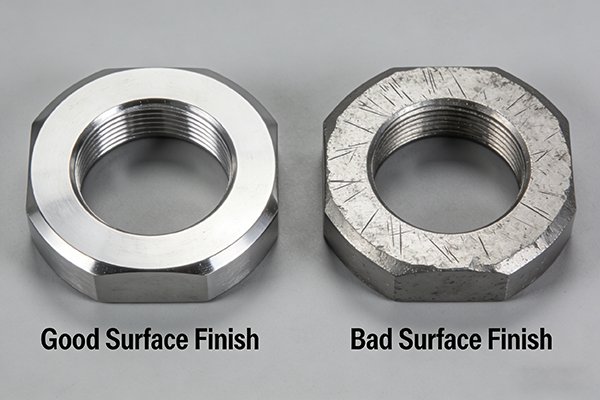
Chatter is a symptom of a problem in the system. It's a vibration8 that gets out of control. My first reaction is always to listen. What is the machine telling me? The easy fix is to change the cutting parameters12. Sometimes, just increasing or decreasing the spindle speed by 10% can break the vibration8 pattern. But this is just a temporary fix. You need to find the real cause. Often, the problem is rigidity. Is the tool sticking out too far? Is the tool holder worn? Is the part held securely? Another big factor is the cutting edge of the tool itself. At our NV-Tool factory, we pay special attention to the cutting edge preparation13. A brand-new, sharp edge can have tiny, microscopic chips from the grinding process. We use a process called passivation, or micro-rounding14, to create a very small, strong, rounded edge. This small detail makes the edge much tougher and less likely to chip, which dramatically improves surface finish9 and prevents the start of vibration8s. So, check your setup, but also make sure you are using a high-quality tool with a properly prepared cutting edge.
Is Your Strategy for Clearing Chips as Good as Your Strategy for Making Them?
You are cutting a deep pocket. Everything looks good, but then the tool breaks. You look closer and see the pocket is packed with chips that the tool recut.
An effective chip evacuation strategy15 is critical. Use tools with a high helix angle16 for deep pockets, and ensure you have adequate coolant17 or air blast to clear chips from the cutting zone.
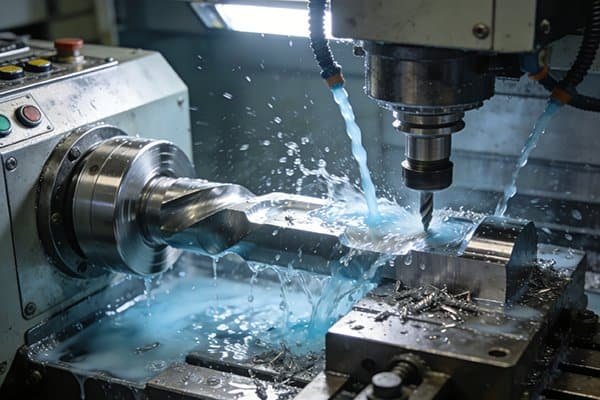
Making chips is only half the job. Getting them out of the way is the other half. If chips get packed in a flute, they can jam, break the tool, and ruin the part. I've seen this happen many times, especially in deep slots or pockets. This is where tool geometry18 becomes so important. We design our solid carbide end mills with different helix angle16s. The helix angle16 is the spiral of the flutes. A higher helix angle16, like 40 degrees or more, acts like an auger. It actively lifts the chips up and out of the cut. This is fantastic for deep machining and helps create a better surface finish9 because you are not recutting old chips. Coolant or an air blast is also a huge part of the strategy. It needs to be aimed directly at the cutting zone to physically push the chips away. A good coating also helps. The smooth surface of a quality coating reduces friction, so chips don't stick to the tool and can slide out of the flute more easily. Your strategy must include a clear path for every chip you create.
Conclusion
A winning strategy is a complete plan. It considers the material, the machine's rigidity, the tool's design, and how you will clear the chips. Focus on the whole system, not just one part.
Explore this resource to understand how a comprehensive machining strategy can enhance productivity and reduce costs. ↩
Learn about the importance of selecting the right tool to optimize machining processes and improve outcomes. ↩
Discover how a rigid setup can enhance precision and reduce tool wear in machining operations. ↩
Understanding speeds and feeds is crucial for maximizing efficiency and tool life in machining. ↩
Find strategies to extend tool life and reduce costs in your machining processes. ↩
Explore the significance of carbide grades in tool selection and performance. ↩
Learn how the ISO system helps in selecting the right tools for different materials. ↩
Discover techniques to minimize vibration and improve machining quality. ↩
Explore the key factors that influence surface finish and how to achieve high-quality results. ↩
Learn about indexable end mills and how they can be beneficial for heavy roughing. ↩
Learn how to balance depth of cut with other parameters for optimal machining performance. ↩
Explore methods to optimize cutting parameters for better machining outcomes. ↩
Understand the importance of cutting edge preparation for achieving better surface finishes. ↩
Discover how micro-rounding improves tool performance and surface finish. ↩
Learn how to effectively manage chip evacuation to prevent tool breakage and improve machining efficiency. ↩
Explore how helix angle affects chip removal and surface finish in machining. ↩
Discover the role of coolant in enhancing machining efficiency and tool life. ↩
Understand the role of tool geometry in determining machining efficiency and effectiveness. ↩